I recently posted some photos of a cocktail arcade cabinet I built, and Ithought I’d go over the fabrication for those interested. Aseries of photos taken during the process is available here. I also took some photos of a Revenge of Doh cabinetfor research purposes, and those are available here. I’ve detailed software in a different post since that was asignificant undertaking in its own right.
I was inspired to make this cabinetafter watching a documentary called The King ofKong. It’s about a guy’s attempt at beating the highscore record in Donkey Kong. It made me try Donkey Kong onMAME, and snowballed into wanting a proper arcade cabinet to enjoyclassic games. I was also in need of small table for a cornerin my apartment, and an arcade cabinet was the perfect fit.
The Plans
My cabinet is a modification of theplans from Kyle Lindstrom at Mike’sArcade. If you’re planning a project like this, you mayhave come across it. He’s got the most detailed plans for aMs. Pac-Man cabinet you could ask for. Note that there aretwo sets of plans at Mike’s Arcade. I followed the Ms. Pac-Manplans since they are much more thorough than the Pac-Man plans. That being said, I also read over the Pac-Man plans for moregeneral info.My changes to the Ms. Pac-Man plansare as follows:
- I used 3/4″ thick birch plywood for everything.
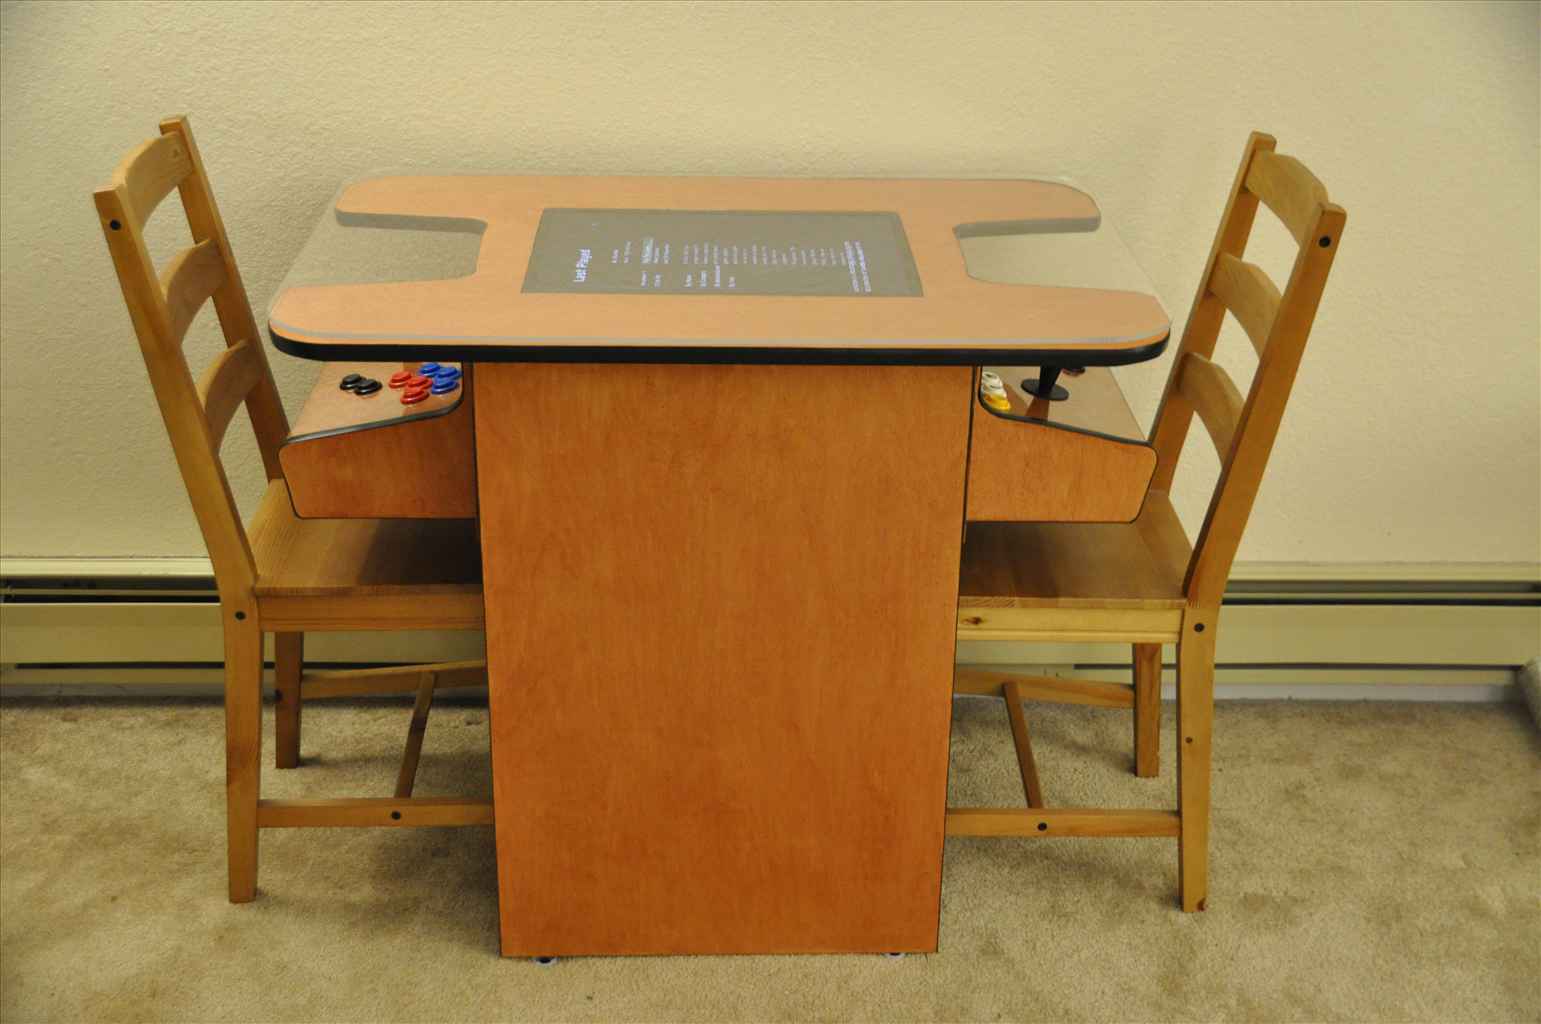
- My tabletop is 25″x37″ and 3/4″ thick, while the Ms. Pac-Man plans call for a tabletop that is 22″x32″ and 1″ thick. I wanted something slightly larger, and I made some subtractions in other places that allowed for this increased size on the same 4’x8′ piece of plywood. I used the same corner radii as the original. This is item #10 in the plans. Also, making the tabletop 3/4″ thick means I didn’t have to buy 1″ T-molding.
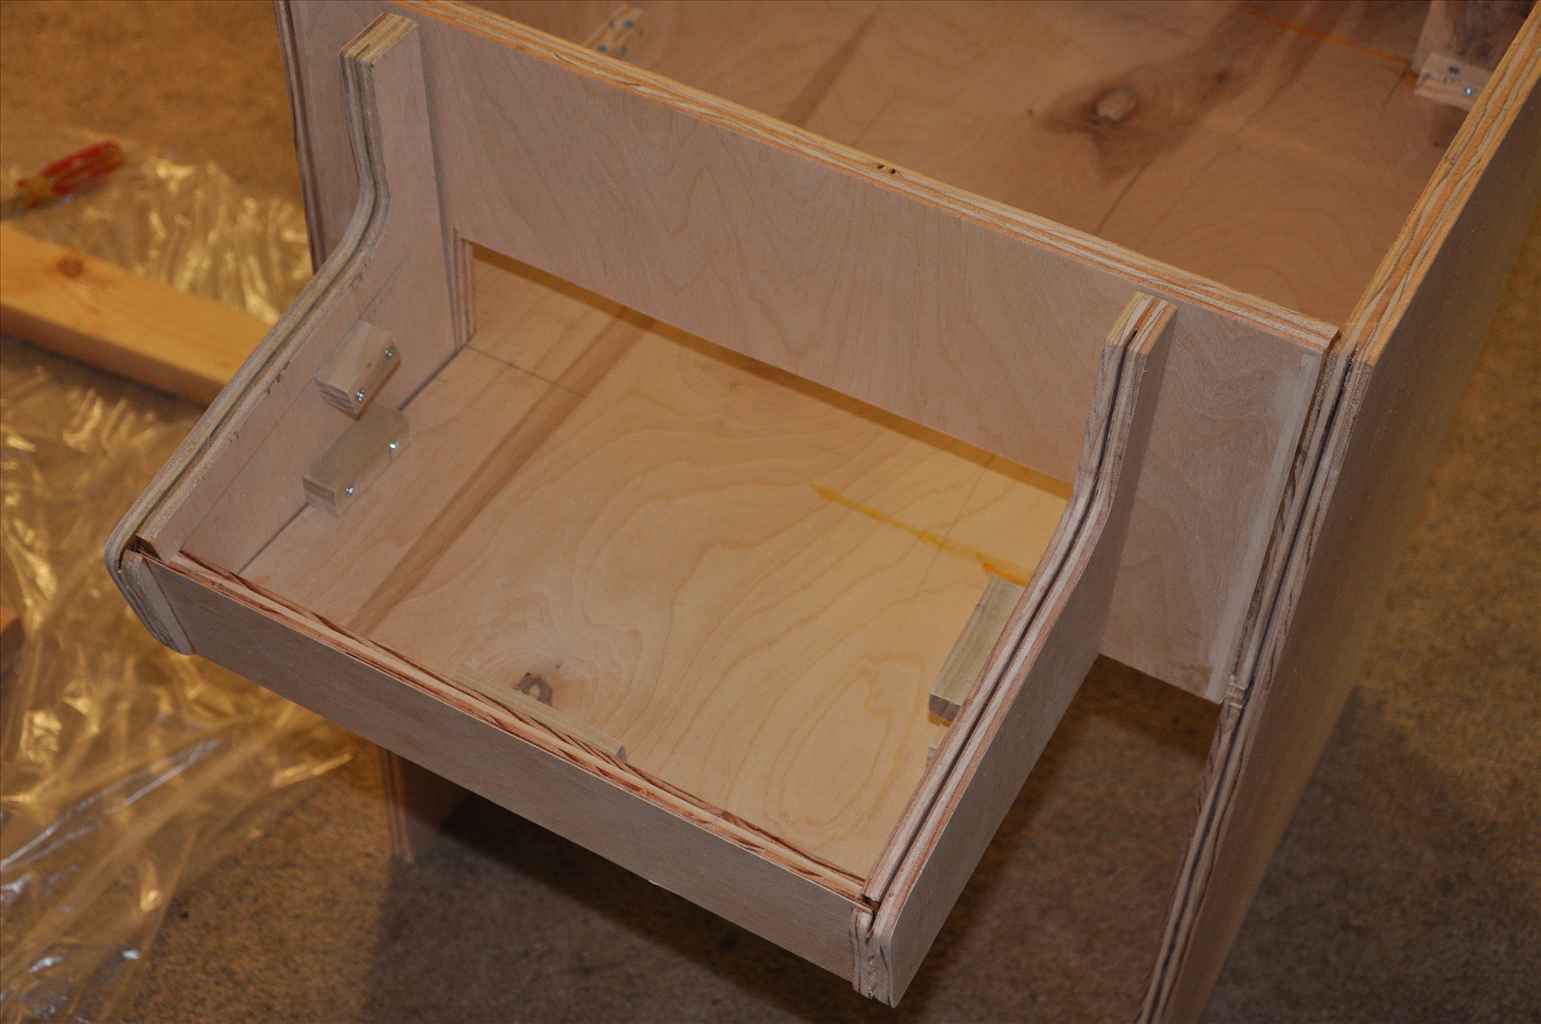
- I wanted room for my legs under the table, and I have no need for a coin box, so I completely changed items 1 and 3 to 9″x20x1/4″ U-shaped pieces. You can see the U-shaped piece in this photo:
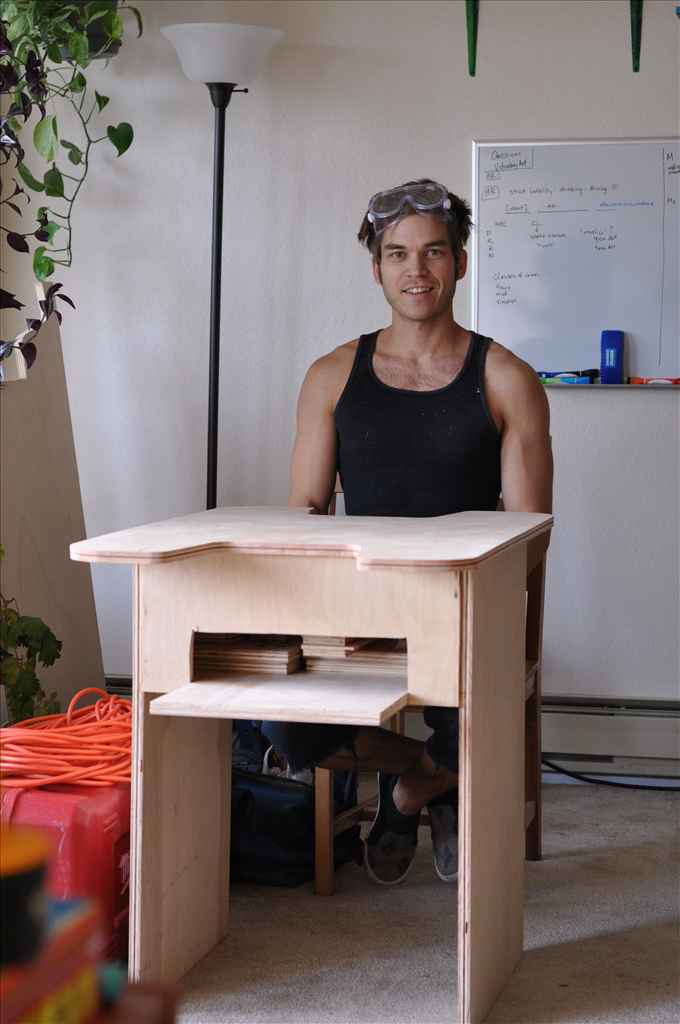
The U-shape is to allow you to run all the necessary wiring to the control panel. It measures 3″x14″.
- I wanted my table to be slightly taller, so I made item 2 30″ tall.
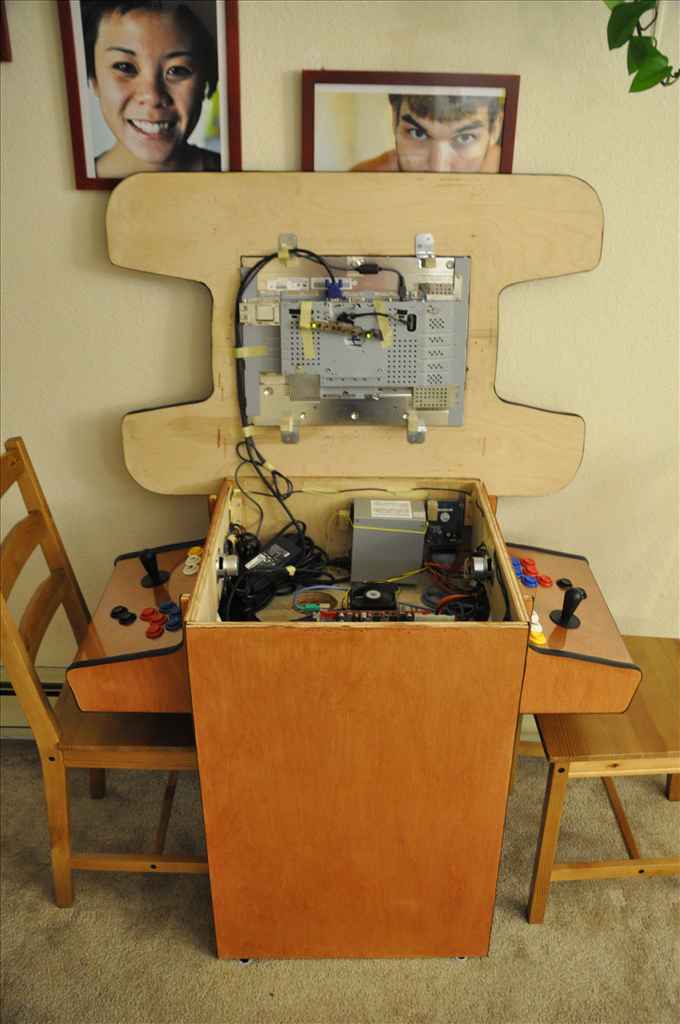
- Since I removed a large part of the volume in shortening items 1 and 3, this forced me to use an LCD (what I had planned on). Because of this, items 4 and 5 were not needed, as comprise the hinge for lifting the top of the cabinet, monitor included. As such, I replaced items 4 and 5 with a duplicate of item 2. This was a really useful simplification, and made construction of the box a lot simpler.
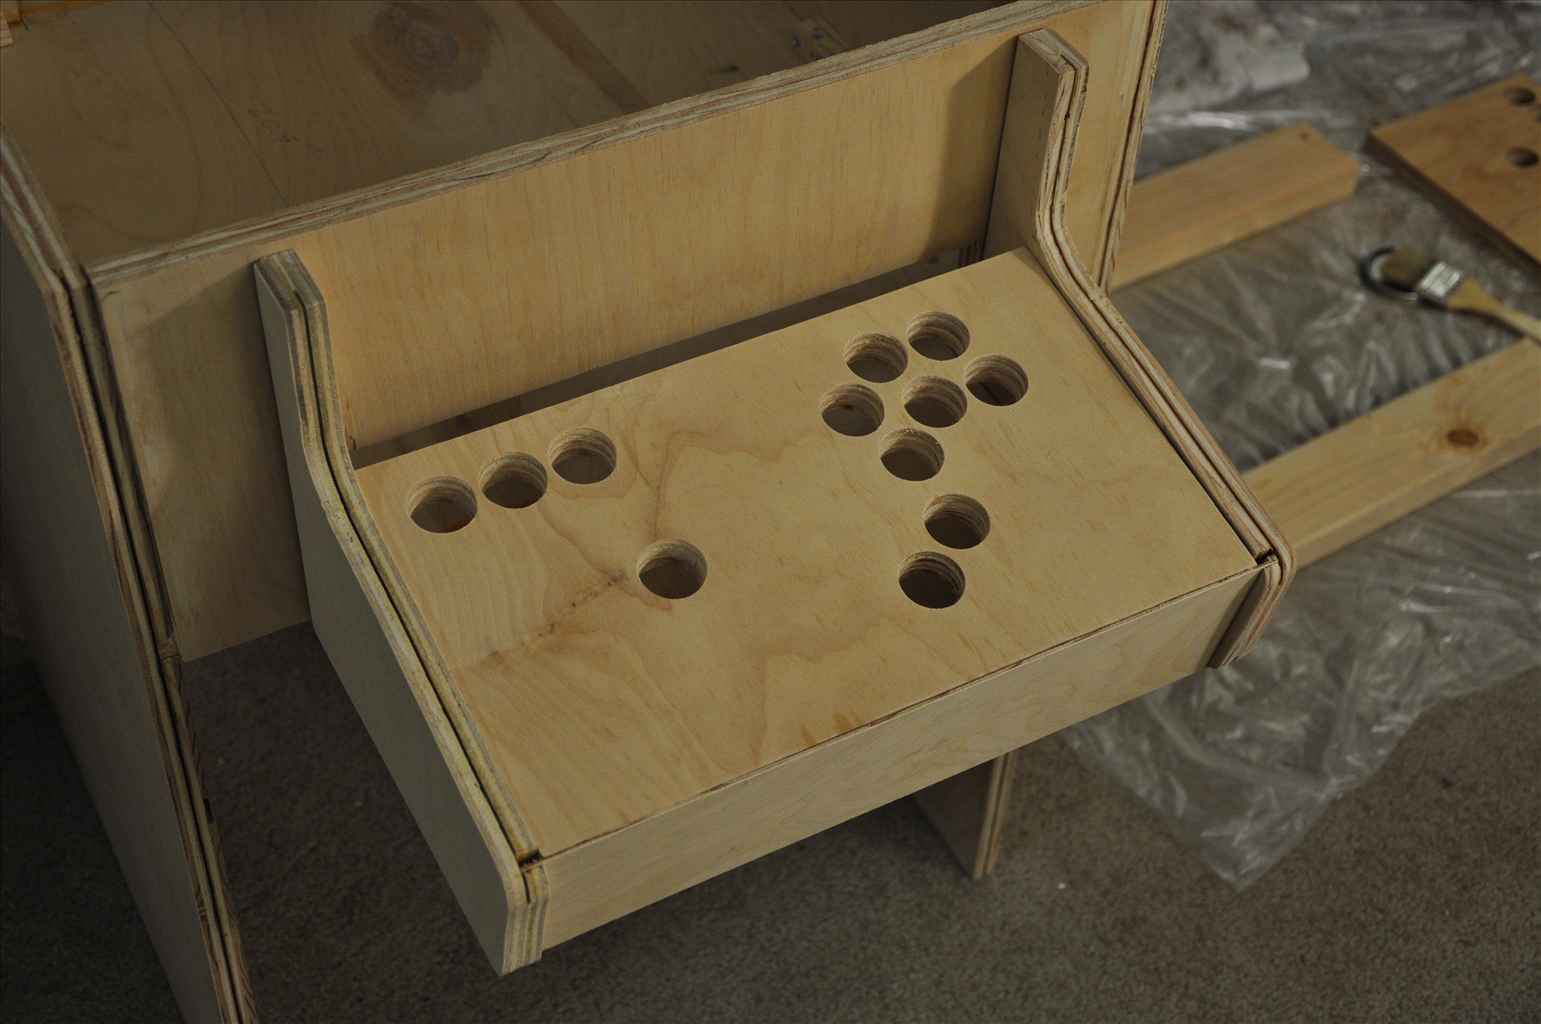
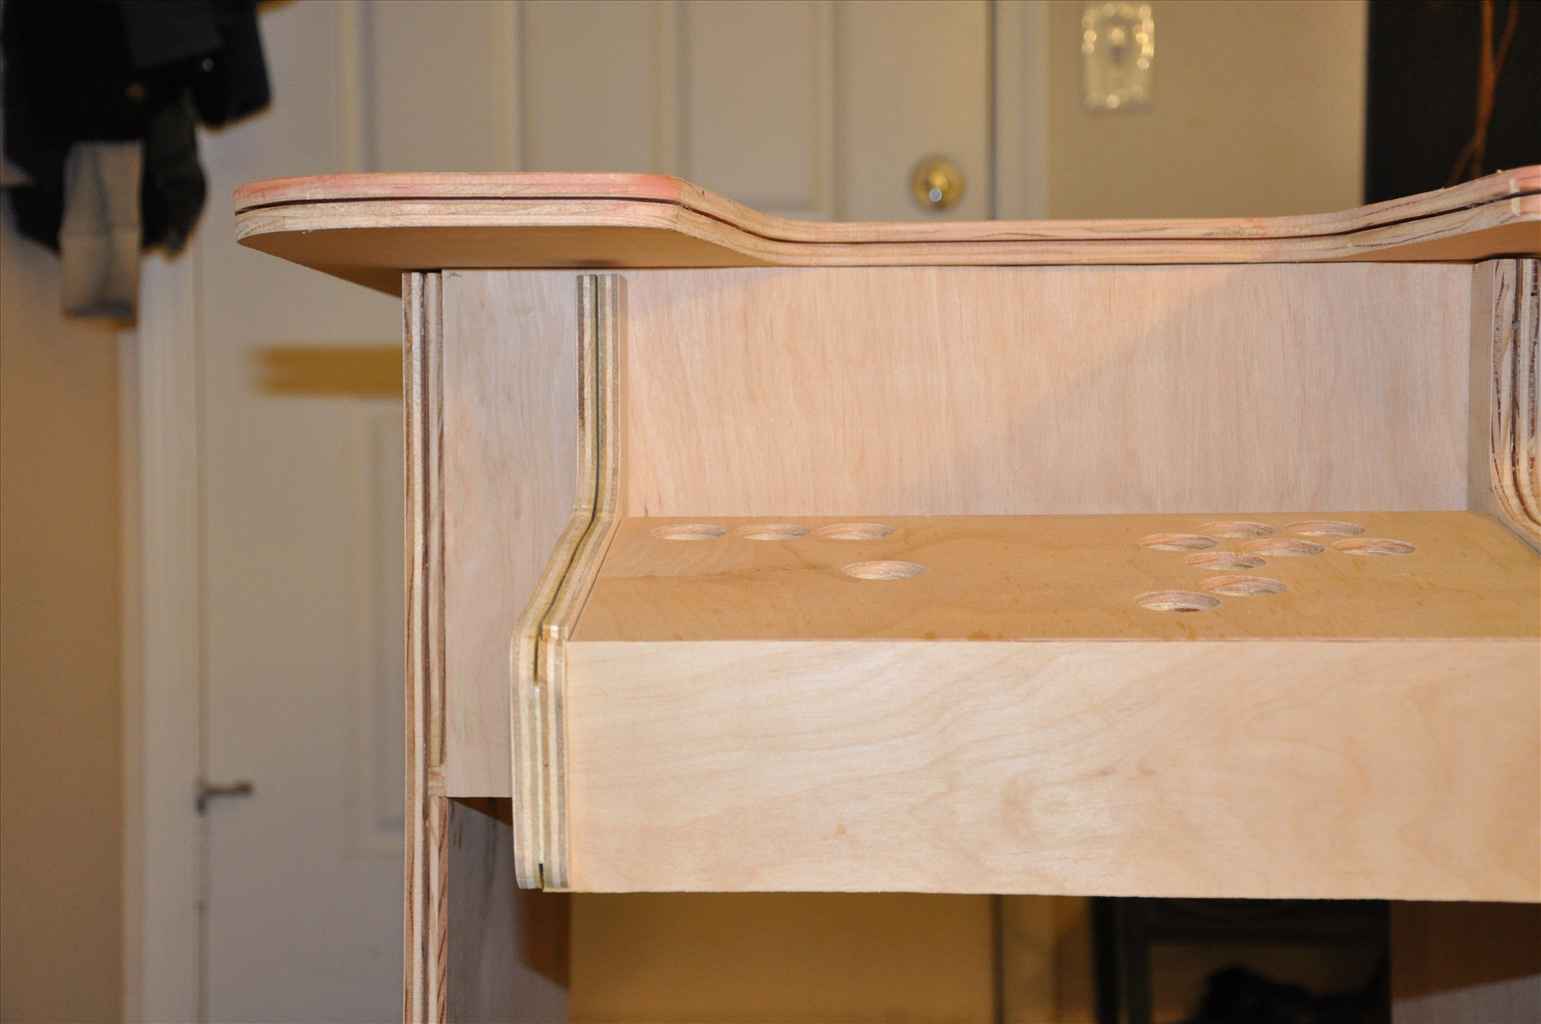
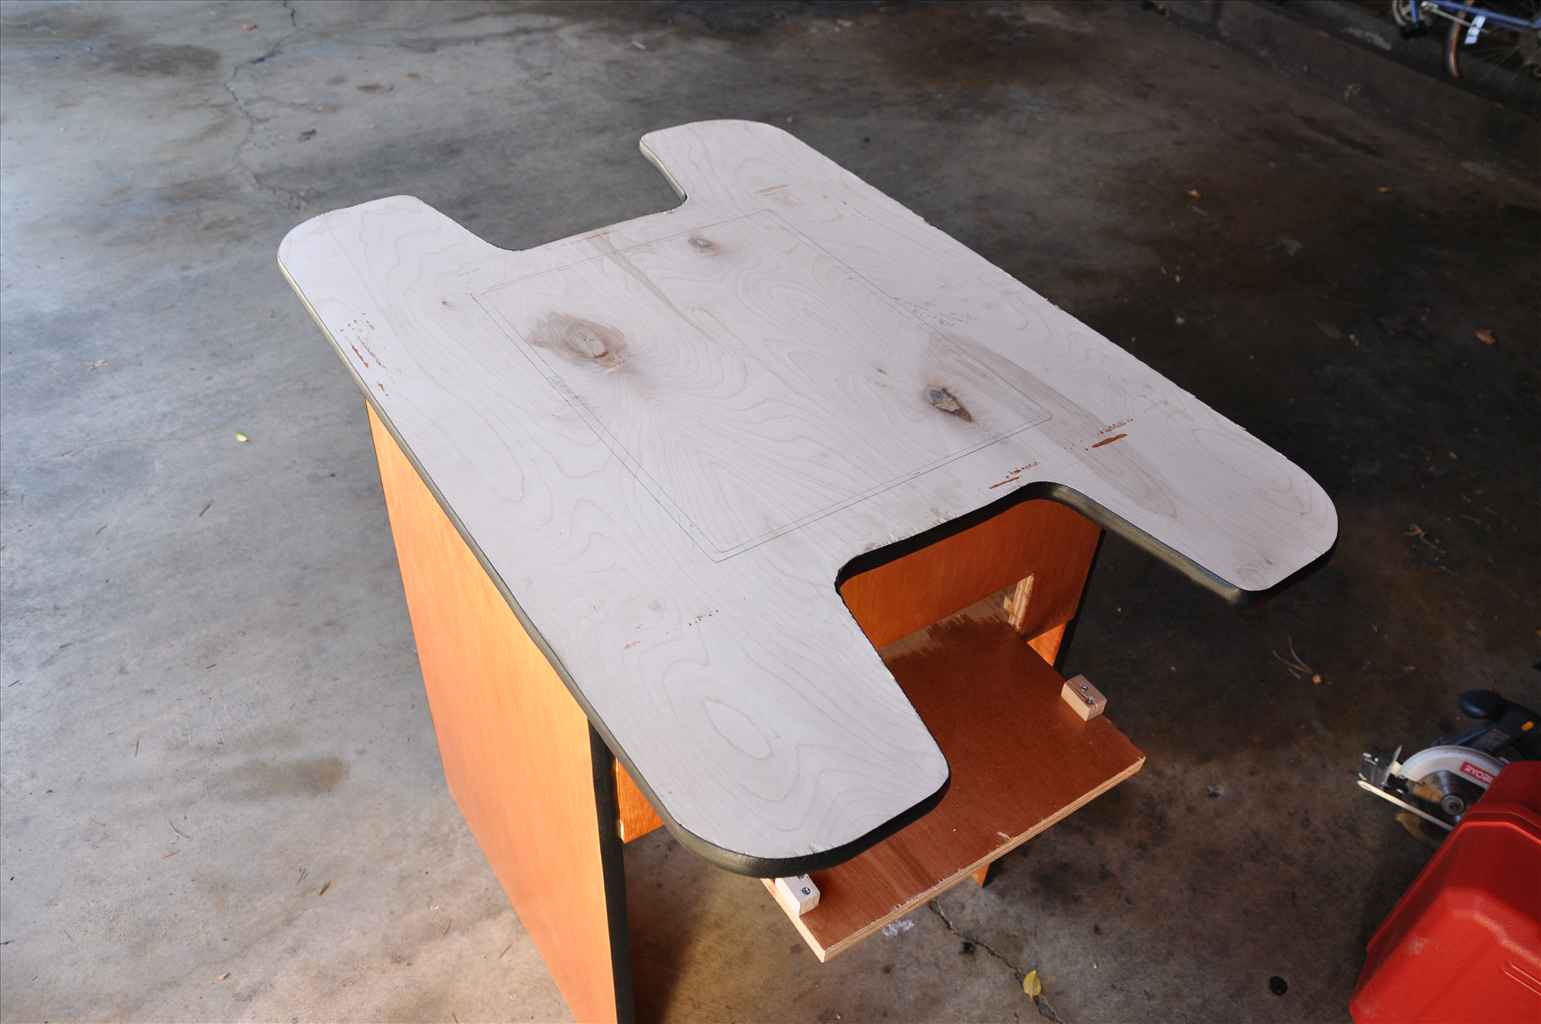
- Item 6, the bottom is much different because of the change to allow leg room. It is now 9″ from the top of the cabinet, meaning you have to route the groove for it in a different place on items 1 and 3. I also adjusted item 6 to include the base of each control panel, resulting in a big plus sign:
This piece is cut out of a rectangle measuring 30 1/2″ x 20 1/2″. The 20 1/2″ width leaves room for a 1/4″ tongue joint. I then cut a 3 1/8″x7″ rectangle out of each corner to create the two control panel bottoms. The area for the control panel bottoms measures 7″x14″.
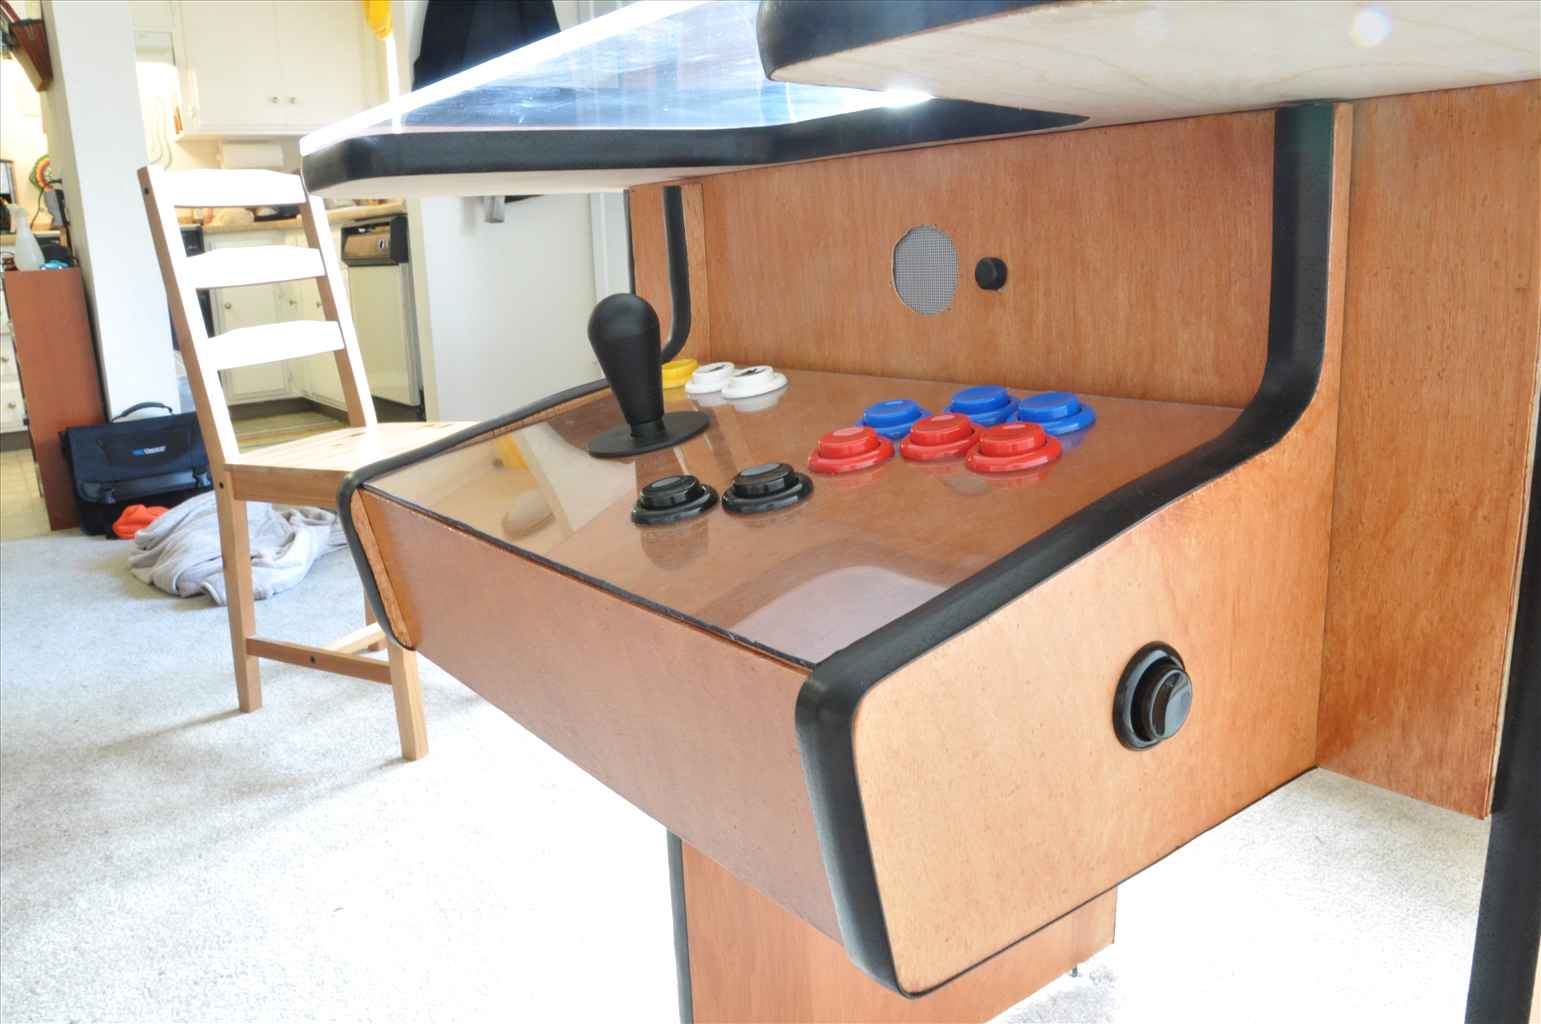
- I contructed my control panels out of wood instead of buying pre-cut metal ones. This allowed me to customize the layout to my own design, and I think it looks better. More on that later.
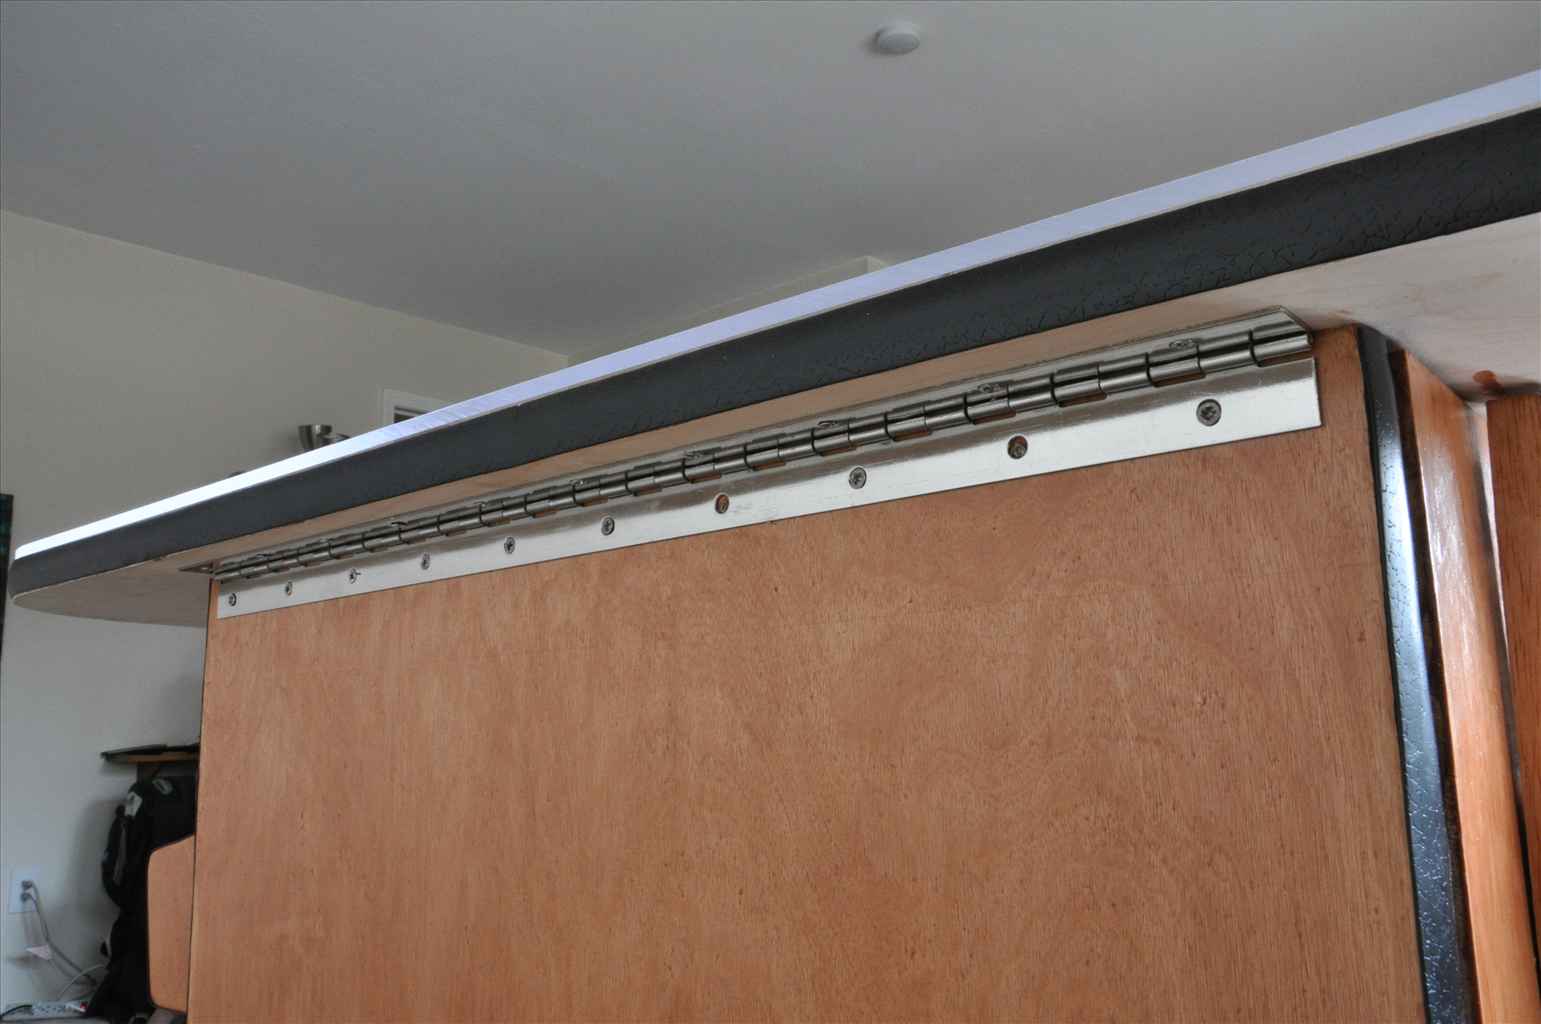
- The hinge for my tabletop is attached to to top itself, making for a bit easier fabrication. This makes for a flip-top lid that is much easier to open up if you need to make an adjustment to the guts of the thing:
Tools
I didn’t have woodworking tools to start. I bought a used Ryobi One cordless kit including a drill and a circular saw, and bought a Ryobi One Router from Home Depot (note that Lowe’s doesn’t stock Ryobi). I also bought a Milwaukee Router off Amazon when it was $108 as well as an edge guide for it for $30. I bought a 1 1/8″ hole-drilling bit from Amazon since I had trouble finding one at Lowe’s and Home Depot. I already had other things like screwdrivers, wire-strippers, pliers, a hammer, X-Acto knife for cutting the T-molding, etc.
Materials
With my adjustments to the plans the whole cabinet, including the top, was constructed from a single 4’x8′ piece of plywood. I had the Home Depot guys cut it into three manageable pieces before taking it home since my hatchback can’t fit a 4′ wide piece of wood. So I didn’t need the 1″ MDF/T-Molding from the list in the Ms. Pac-Man plans, but everything else still applied. I skimped on the following, though:
- I didn’t buy anything to lock my tabletop down.
- I didn’t need a coin door.
- I didn’t buy control panels. I made my own.
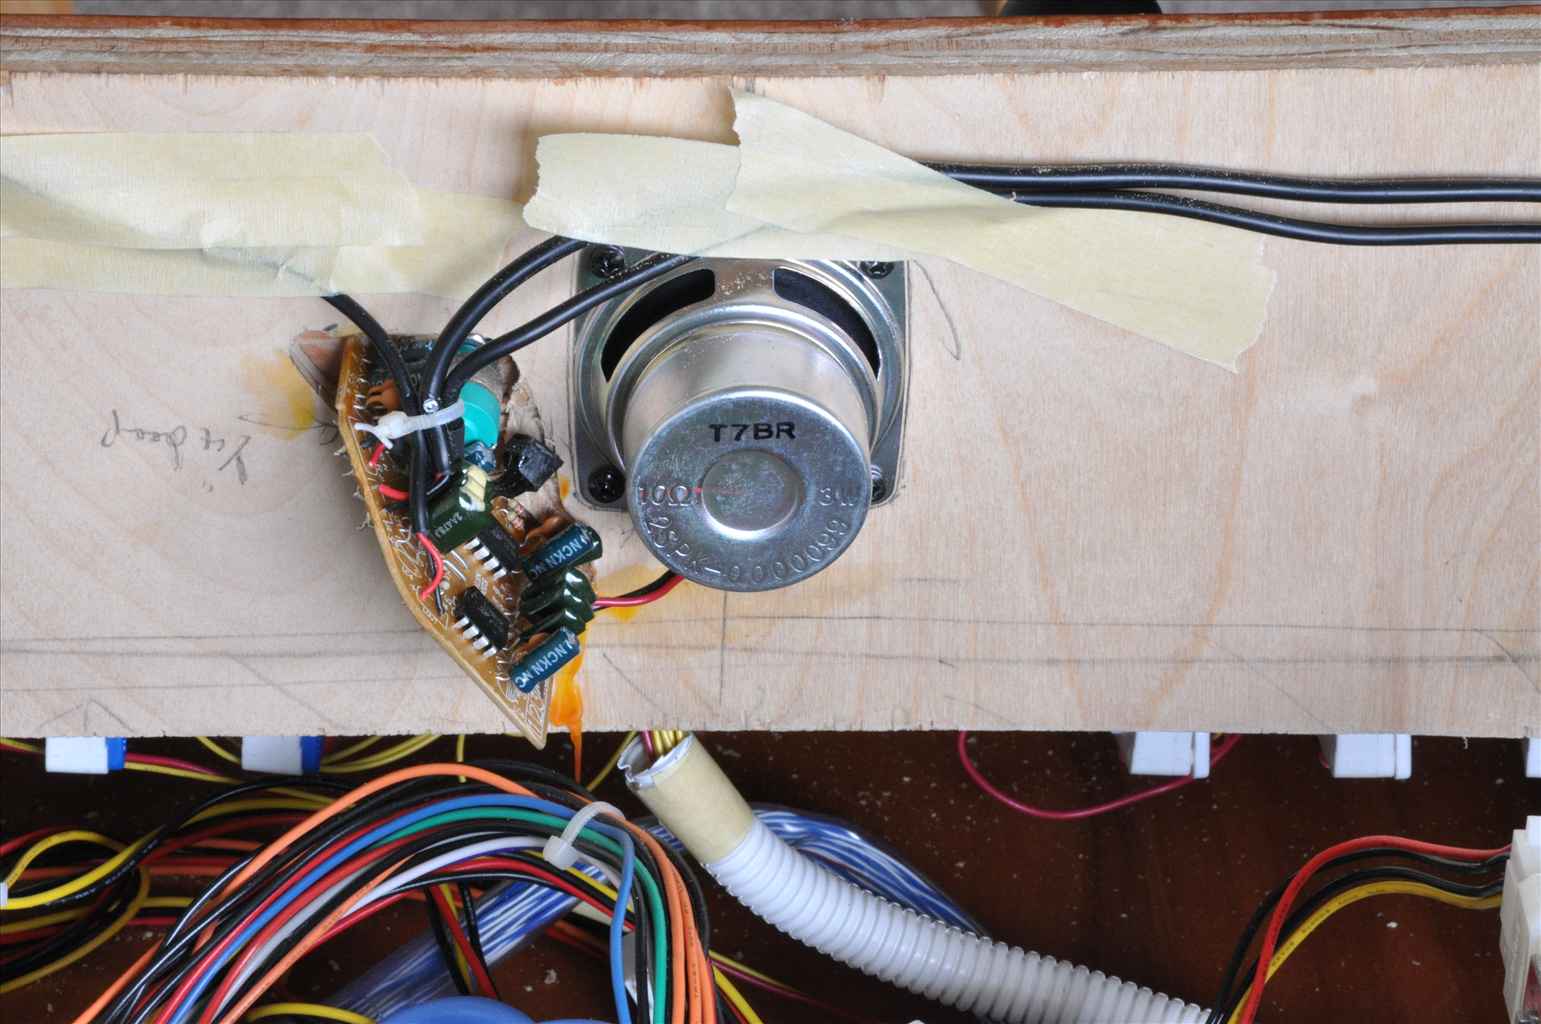
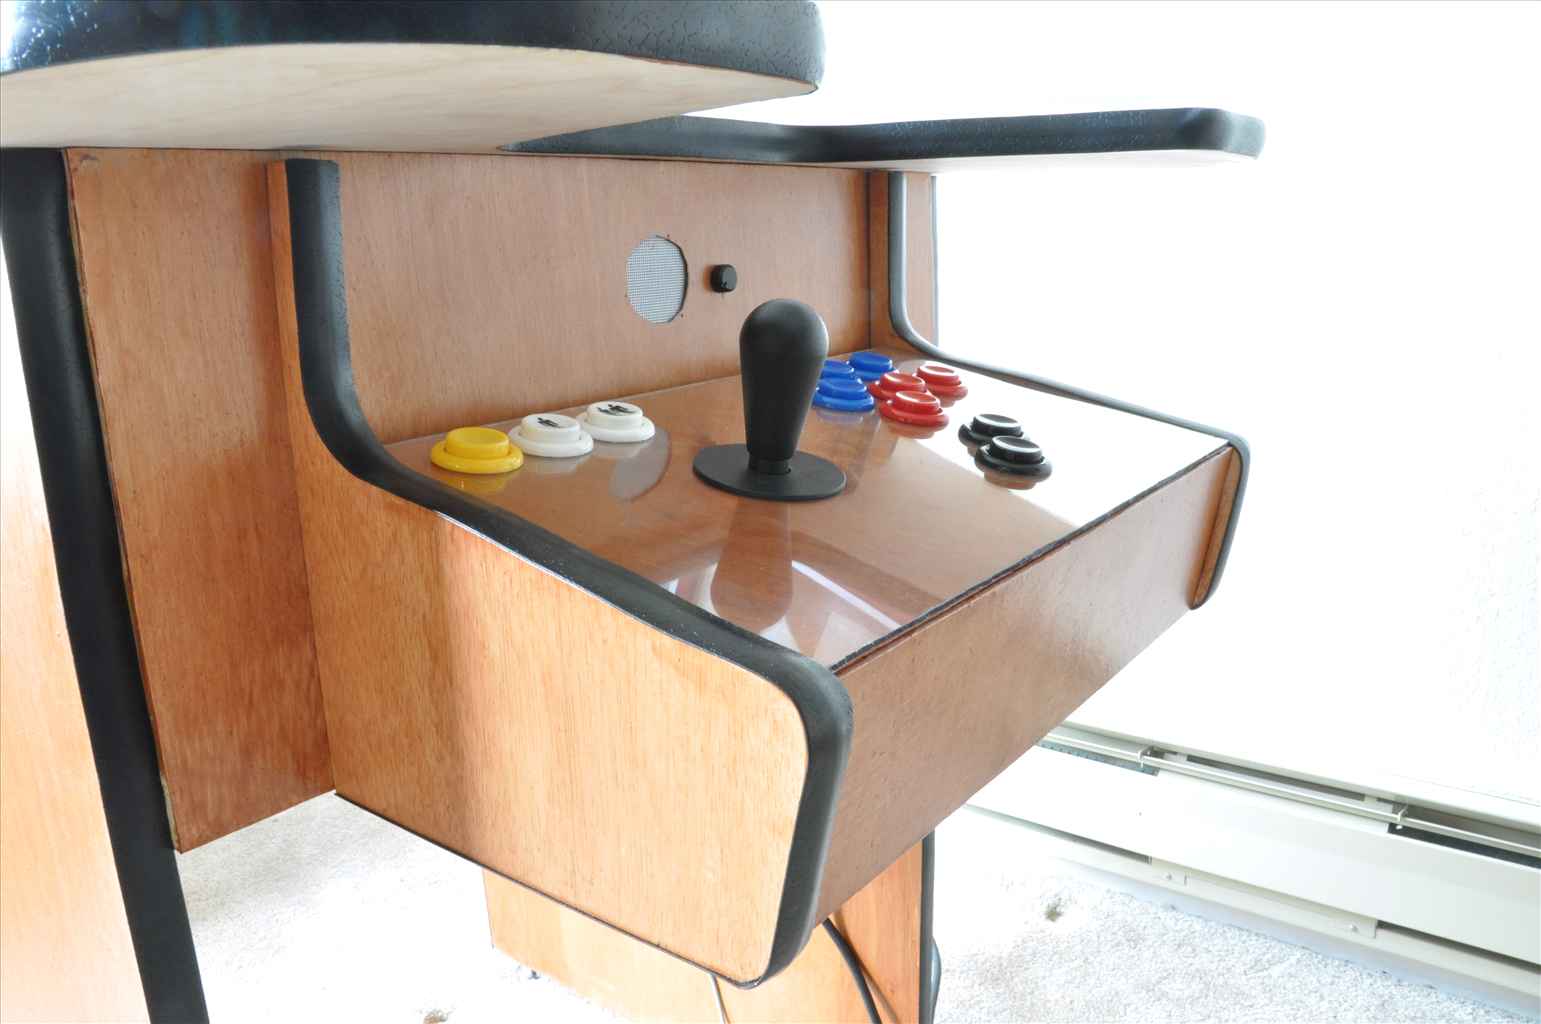
Speakers — I used some trashy dell speakers for mycabinet. They sound better than I expected since they have alot of volume to resonate in. I attached them just above thecontrol panels on each side of the cabinet, as you can see here:
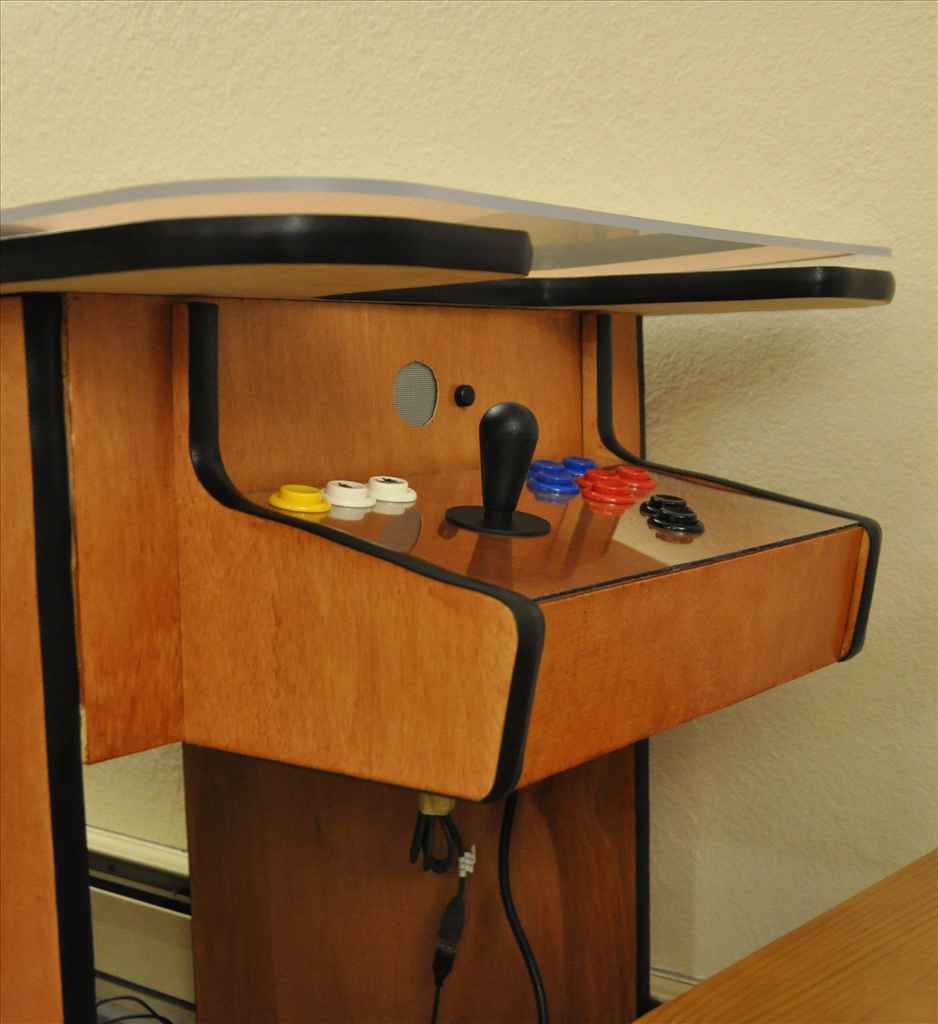
The metal screen came straight off the speaker. I cutit to fit with a pair of scissors, which are now a lot less sharp:). Note that this is the player 1 side, and it has a volumecontrol. The player 2 side does not have a volume control. From the inside, the player 1 side looks like this:
Buttons/Controls — Arcade buttons and joysticks all came from Groovy Game Gear. They have Suzo-Happ buttons (which seem to be everyone’s favorite) for a lot less than the Suzo-Happ site. They also have T-Molding and wiring supplies. For my controller, rather than soldering a keyboard, I bought a KeyWiz40-ST from here as well. It made the whole controller-wiring process really easy, and I recommend some sort of controller over soldering (unless you love soldering). I’d like to note that I didn’t have to do any troubleshooting with my controls with this thing. I wired it up and it worked. Pretty awesome if you ask me.
Plexiglass — I went to a place called Tap Plastics for the plexiglass top. I had planned on ordering something online, but they have a store near my house so I stopped in to ask a few questions. It turned out they could cut my 1/4″ plexiglass with the rounded corners (3.5″ radius) for about $60. This was incredible considering some of the quotes I had gotten online. They had it ready for me in about 5 minutes, too. If you have a Tap Plastics near you, I highlyrecommend them. They have a website, too, so you may be able to order from them online.
Leg Levelers — Leg levelers were a pain to find. Home Depot and Lowe’s have a terrible selection, but I have a wood specialty store called Southern Lumber near me, and they had leg levelers. Your mileage will vary in this case. If there’s a Southern Lumber near you, I recommend it as well. They have some really amazing wood to look at if you like that kind of stuff.
Monitor/Computer — I had an old computer from college, so that was a given. The monitor took some time to pick since I needed really good viewing angles. I settled on a Dell 2001fp, which can be bought on ebay for a little over $100. It’s an S-IPS panel, which essentially means kick-ass viewing angles from ALL angles, not just the sides. It’s 20″ and 4:3 (rather than 16:9 or 16:10), and it fits just about perfectly in the tabletop. For games like Donkey Kong, a 4:3 display in vertical mode fits the game almost perfectly. There’s more wasted space with a widescreen monitor for all games, so 4:3 was the way to go for me. Home Depot and Lowe’s are your friend for the rest of the supplies. I bought plexiglass for my control panels there, as well as screws, wood glue, and other various necessities.
Contruction
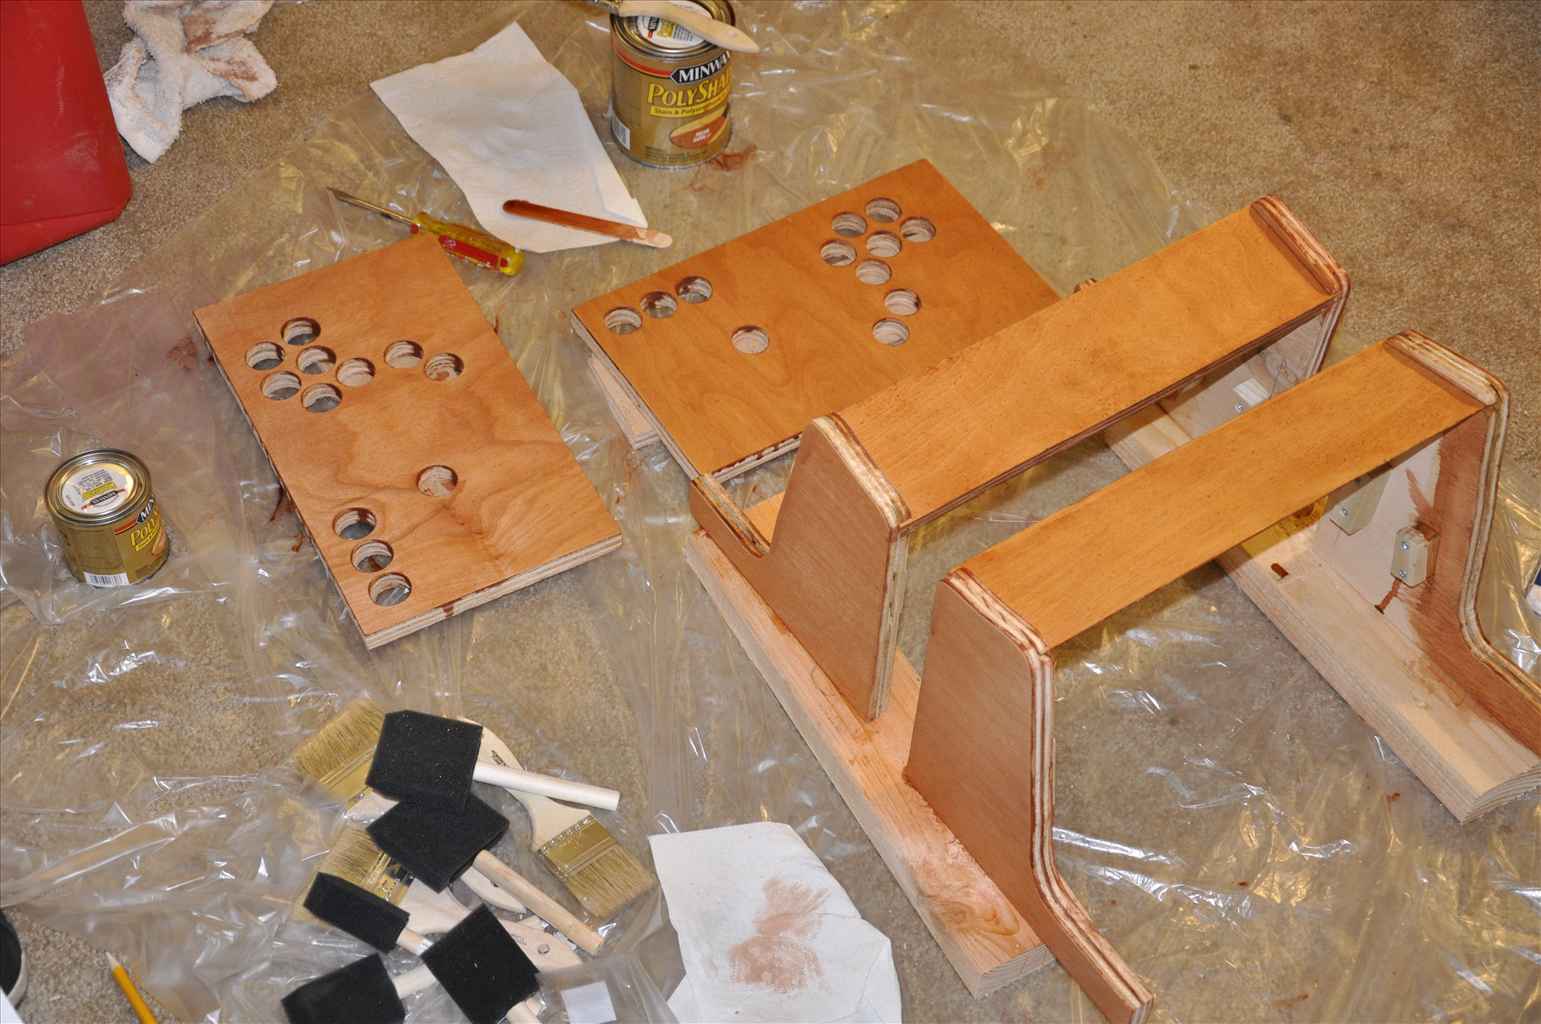
Contruction was a bit ad hoc for me, but I suggest following the Ms. Pac-Man plans as closely as you can. You’re basically making a box, and then adding some things to the sides. My control panels were custom, and all wood. I made a prototype control panel to test my hole-drilling bit, and to get an idea for what kind of layout I wanted:

Once I had done that, I did 5control panel prototypes in Visio. A single player controlpanel layout can be printed to-scale on an 11×17 piece of paper, soI created some life size layouts to put my hands on. My finaldesign can be had here (PDF| VSD). I printed it on an 11×17 sheet of paper and drilledguide holes through each of the button centers. After doingthat, you can go at it with the hole-drilling bit. I did thisfor both the wood and the 1/8″ plexiglass. Even unfinished thepanel looks nice. Take note of the edge routing for theT-Molding.
Thefront face of the panel is connected with a tongue and groovejoint, which would come apart if I routed all the way around theside pieces. So I had to route like this:
My T-molding doesn’t have a groove to fit into on the front face, but it is still held in place by the rest of the grooved edge. I used an X-Acto knife to trim my T-molding.
The actual control panel is held up by the pieces of 1″ square dowel I’ve screwed into the side faces as well as a very deep route in the front face. I also used 1″ square dowel to make the whole control box sit properly on the base. In a perfect world, a nice joint would have been better, but this makes for a detachable control panel if I need to do some adjusting.
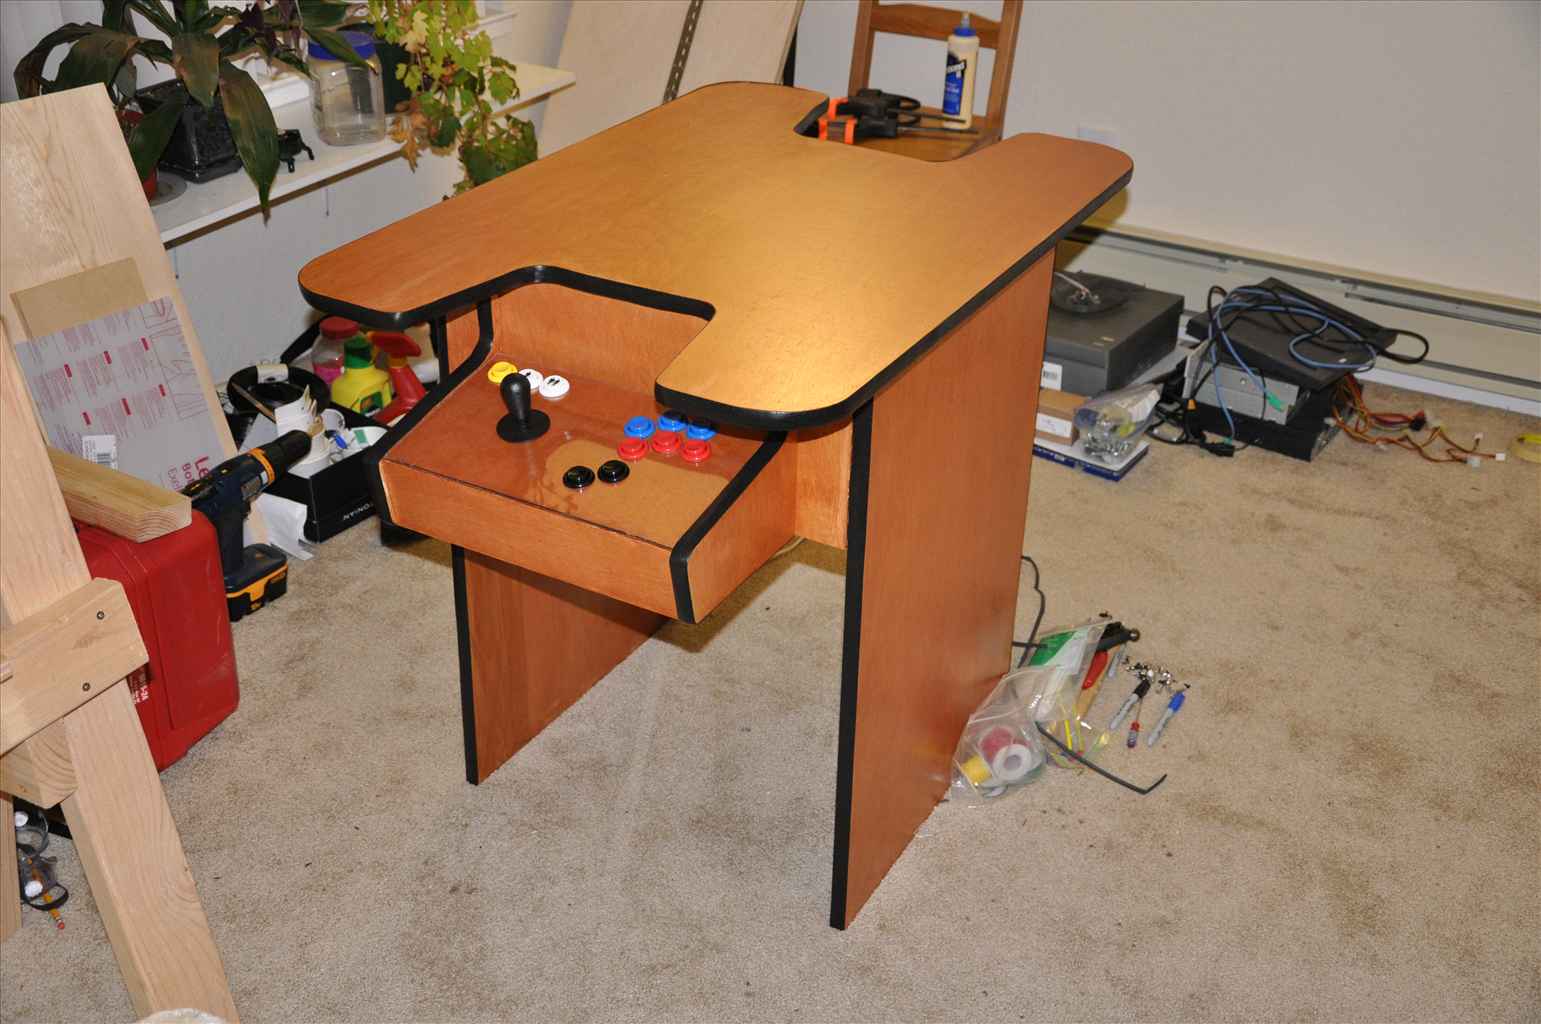
I then applied some finish.
The final product with plexiglass on top looks quite snazzy.
I then pounded the T-molding in. I recommend a rubber malletfor this rather than a hammer, as a hammer can dent the T-molding abit. It’s not terrible if you’re careful, though. Oncethe T-molding was in, it started to look really good.
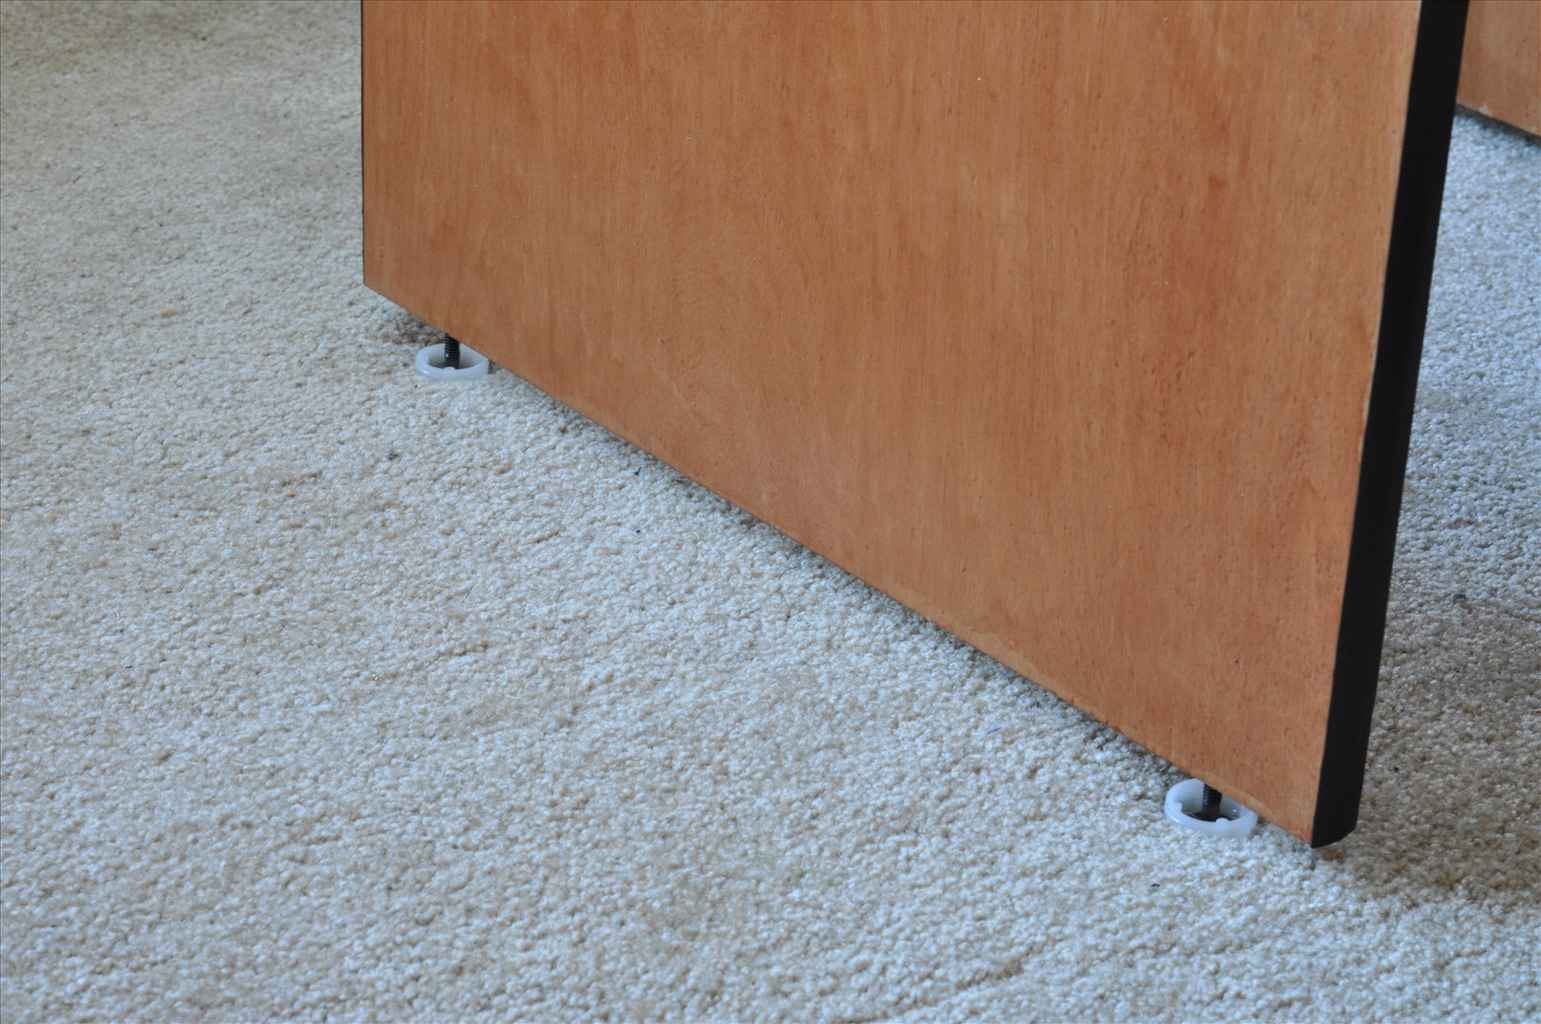
Then I mounted my leg levelers, which are useful for protecting yourfloor and making any minor height adjustments you need.
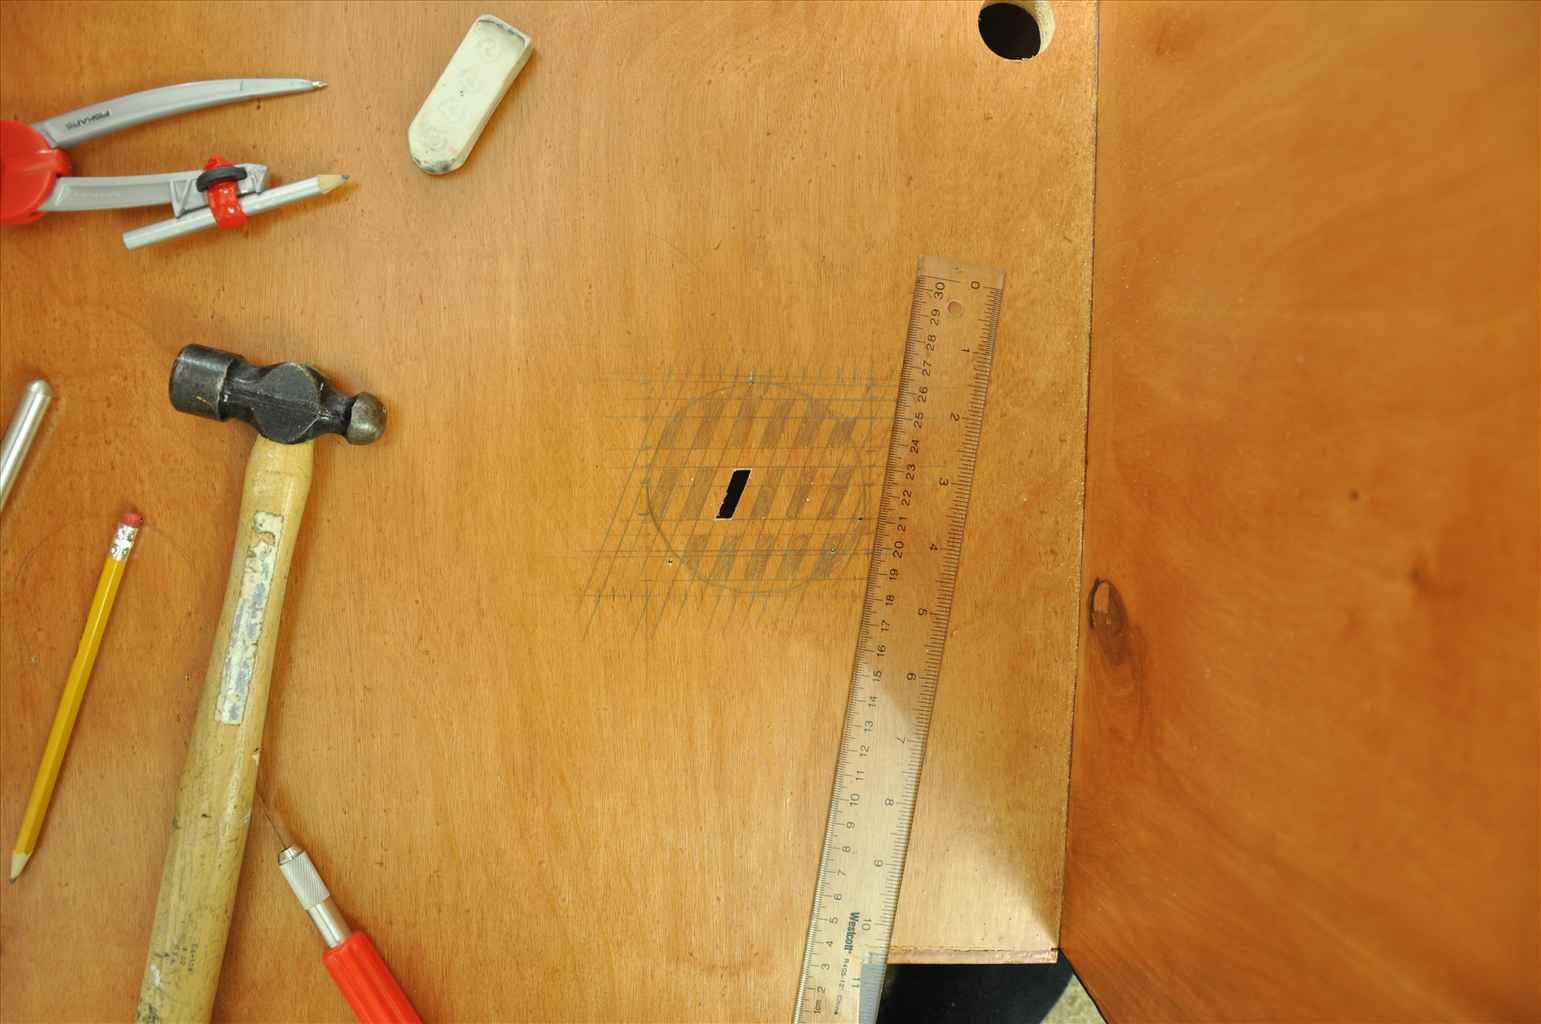
I saved the tabletop/monitor detailsfor last, since having a big piece of wood hinged to the top madethe whole thing a lot less easy to move around. I cut a holefor my monitor after I finished the wood, but I recommend cutting thehole first. I got excited and wanted to see some finishedwood. If you cut the hole first you will have completelyfinished wood to work with. As a result of my excitement, Ihad a few small chips in my tabletop that I had to cover up. Thehinge for my tabletop came from Home Depot, and was a 30″ longhinge that I cut-to-fit with a hacksaw.
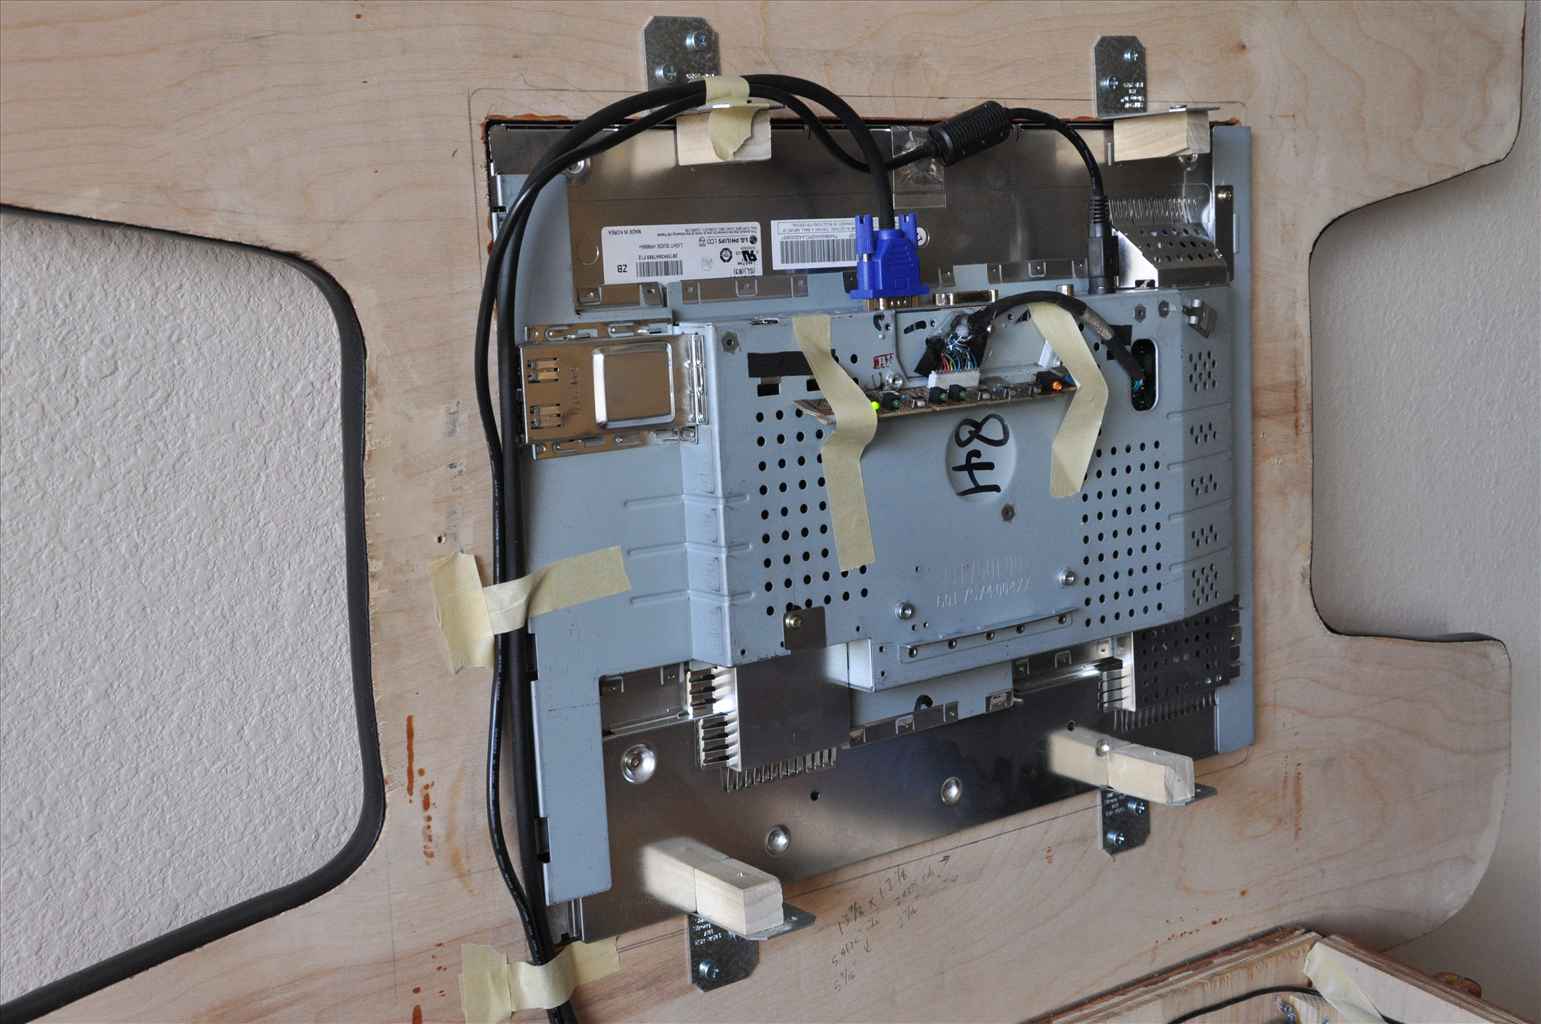
I “mounted” the monitor by cutting a centering it on mytabletop, tracing it, and the cutting a hole for it with a jigsaw. It is held in place by some L-shaped metal pieces and woodthat came from the electrical section at Home Depot. I usedthe same principal here as I did for the control panels; themonitor is resting on a makeshift shelf made from pieces screwedinto the larger structure of the box.
Electrical
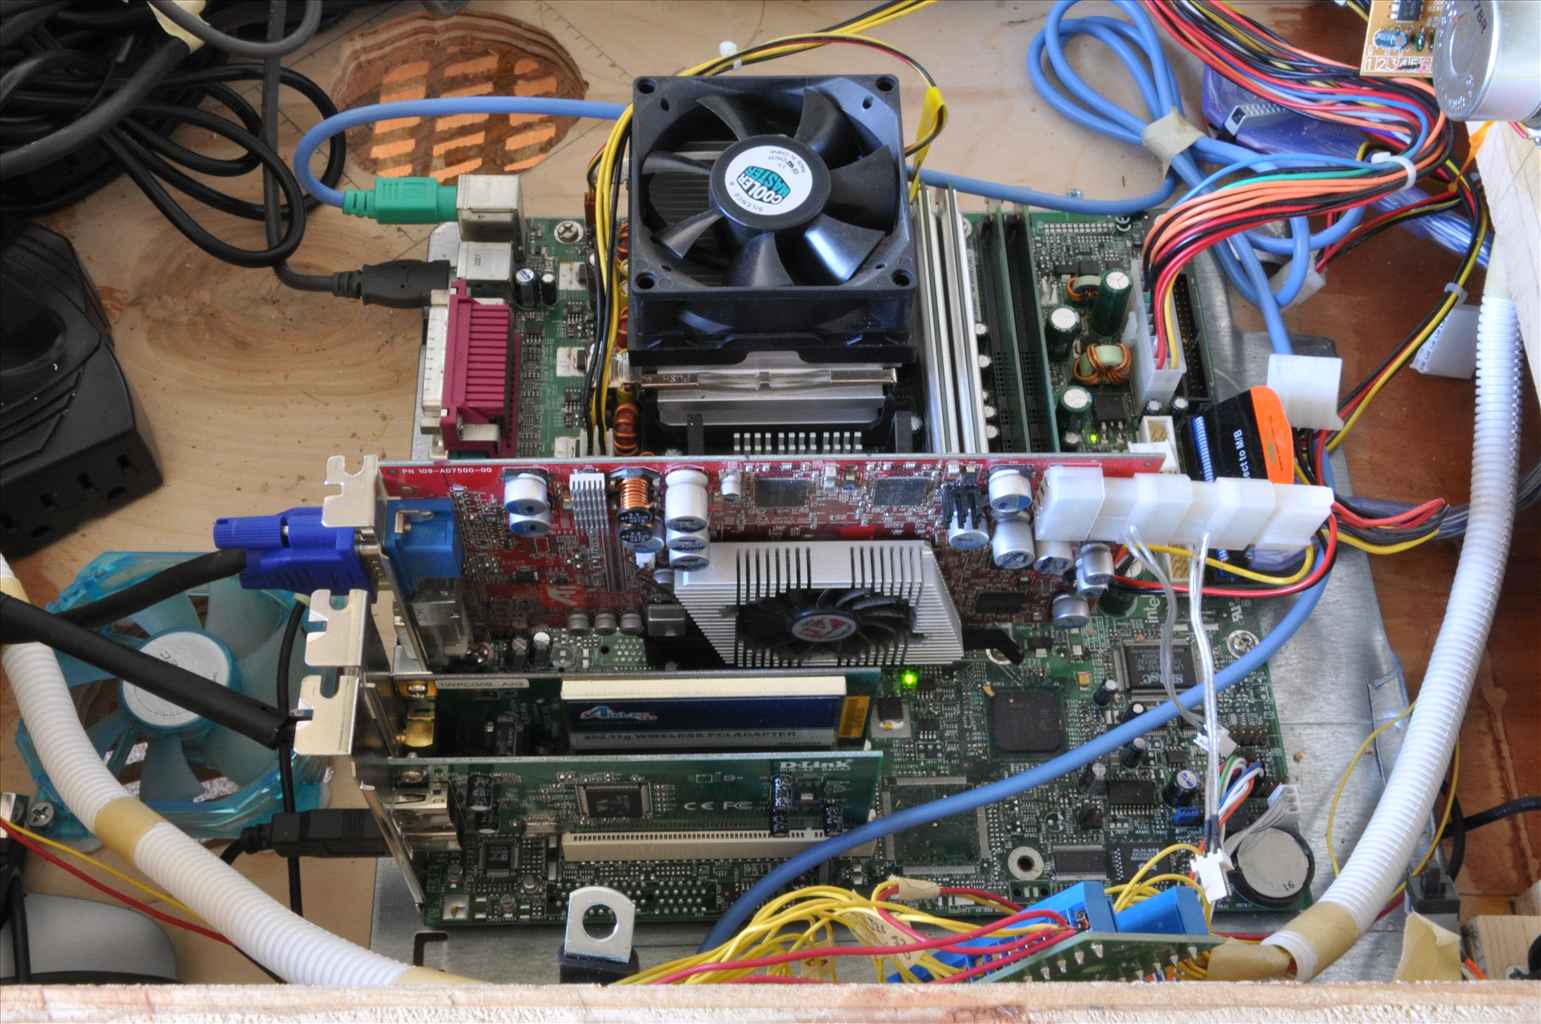
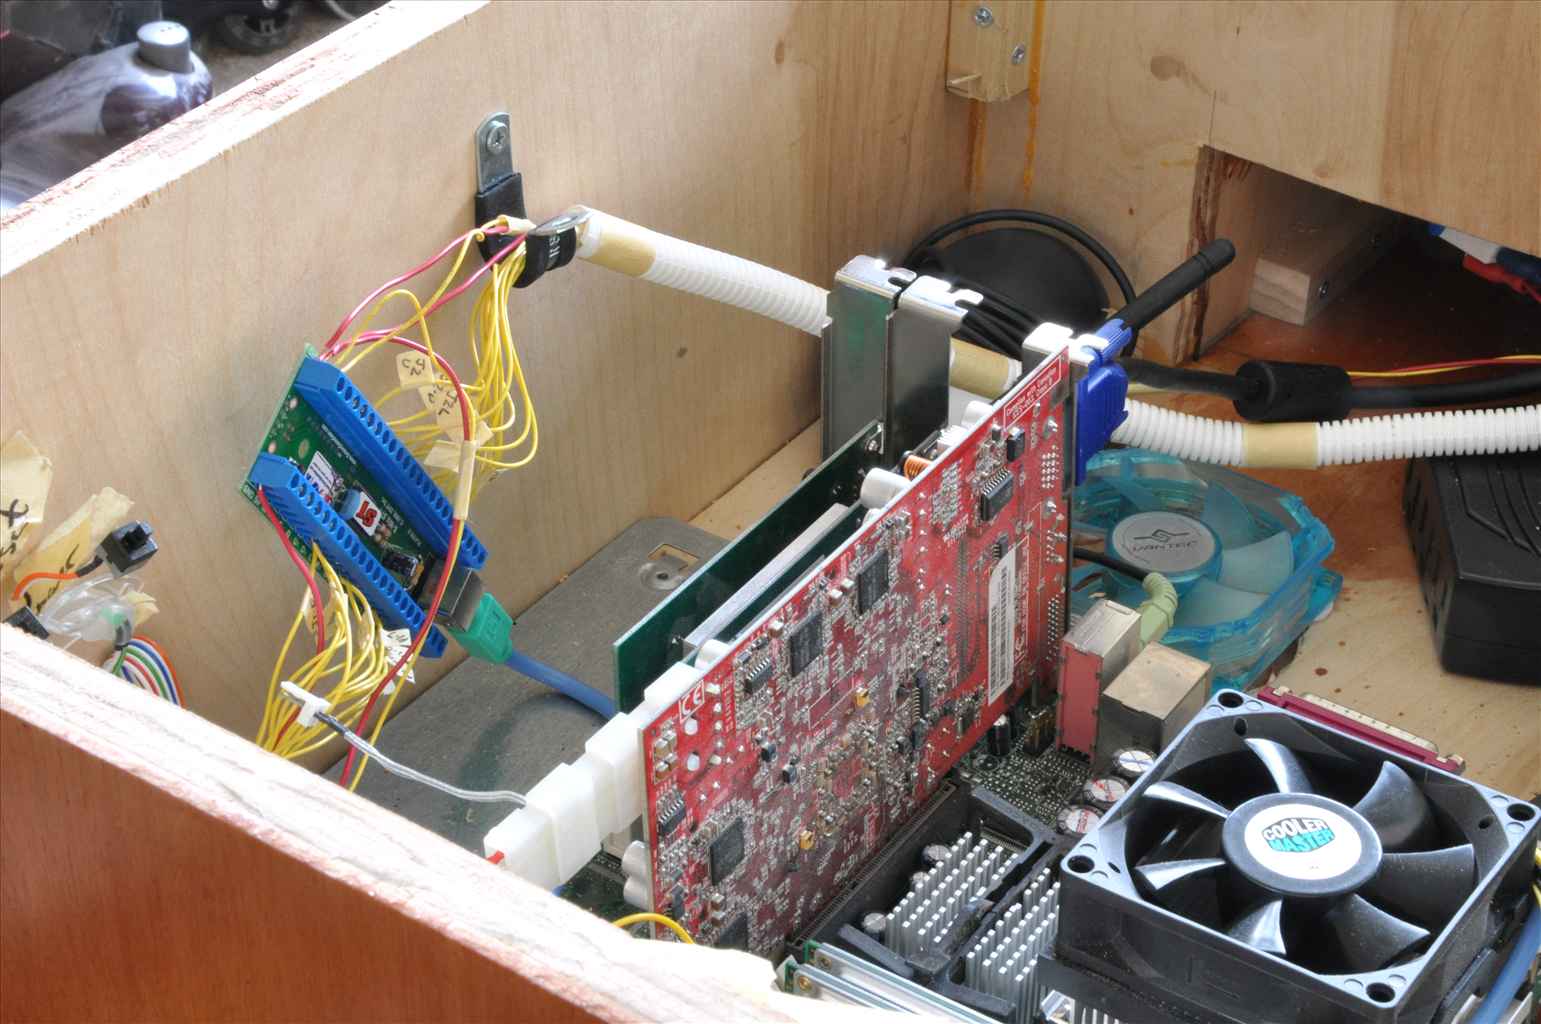
The final bit was getting all the electrical stuff sorted. I massacred the aluminum case my old computer was in. I saved only the metal underneath the motherboard since it makes a nice platform for the mobo. I didn’t have shears, so I just bent the aluminum until it broke off. I’m pretty sure you can pretty easily crack your motherboard doing this (if it’s still attached), so I don’t recommend it. The end result was this:
I rigged the power supply on theside of the box with some string. It’s pretty wacky, but itworks :D. I had some styrofoam handy, so I used that where Icould to protect against vibration noise a bit.
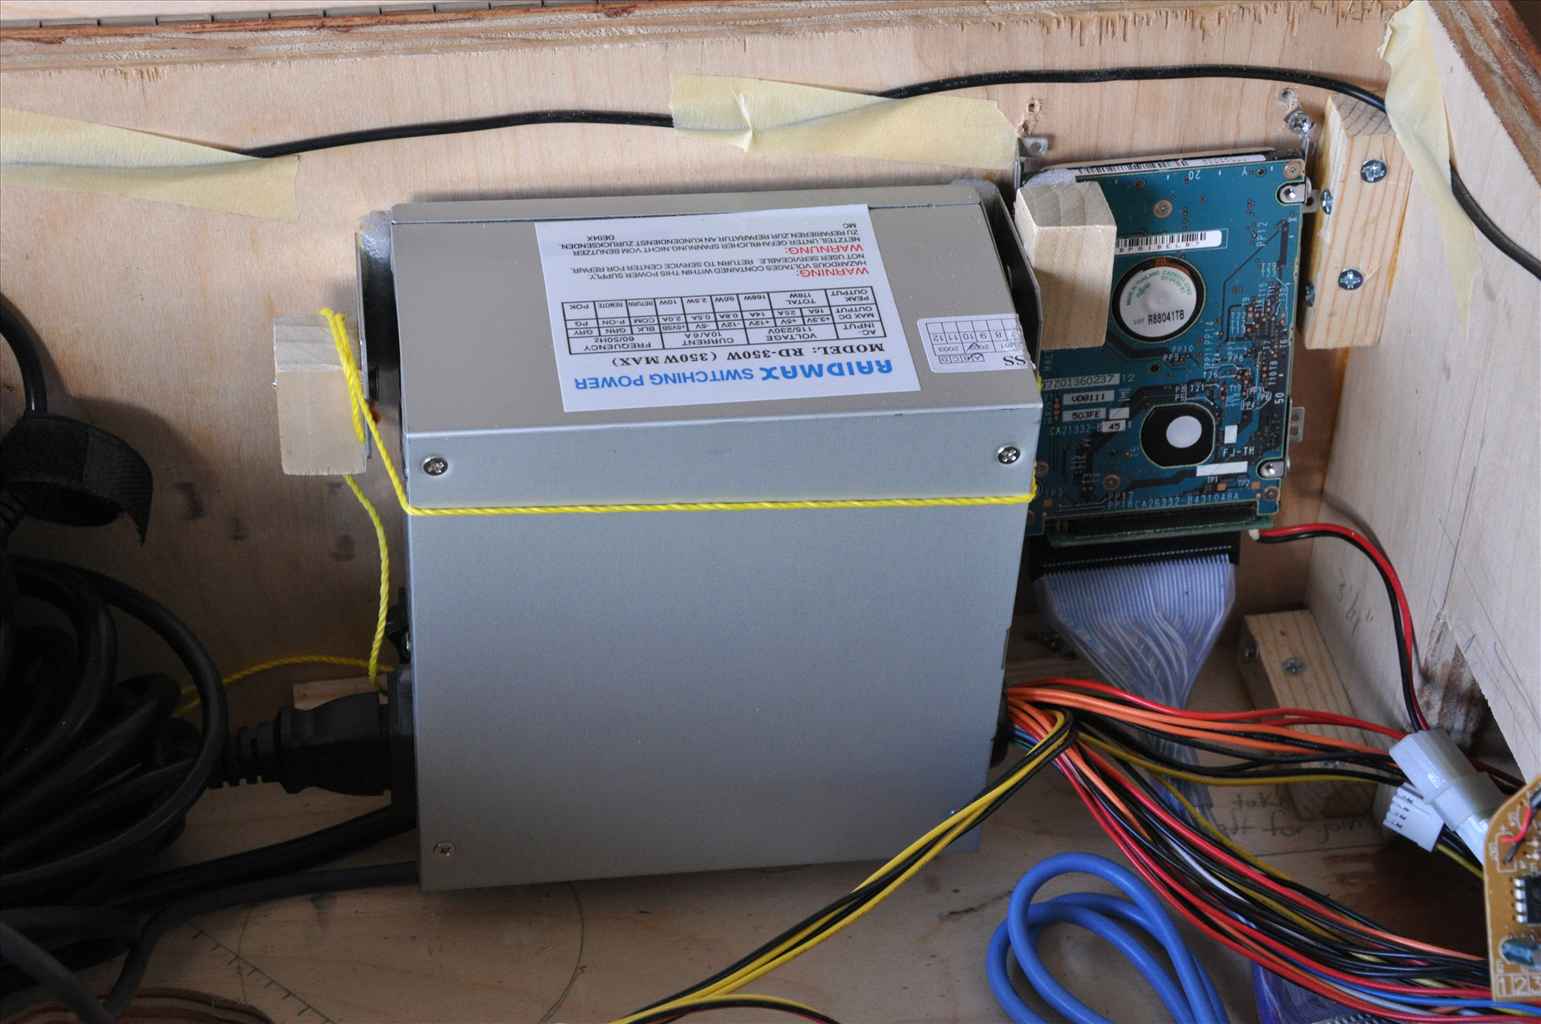
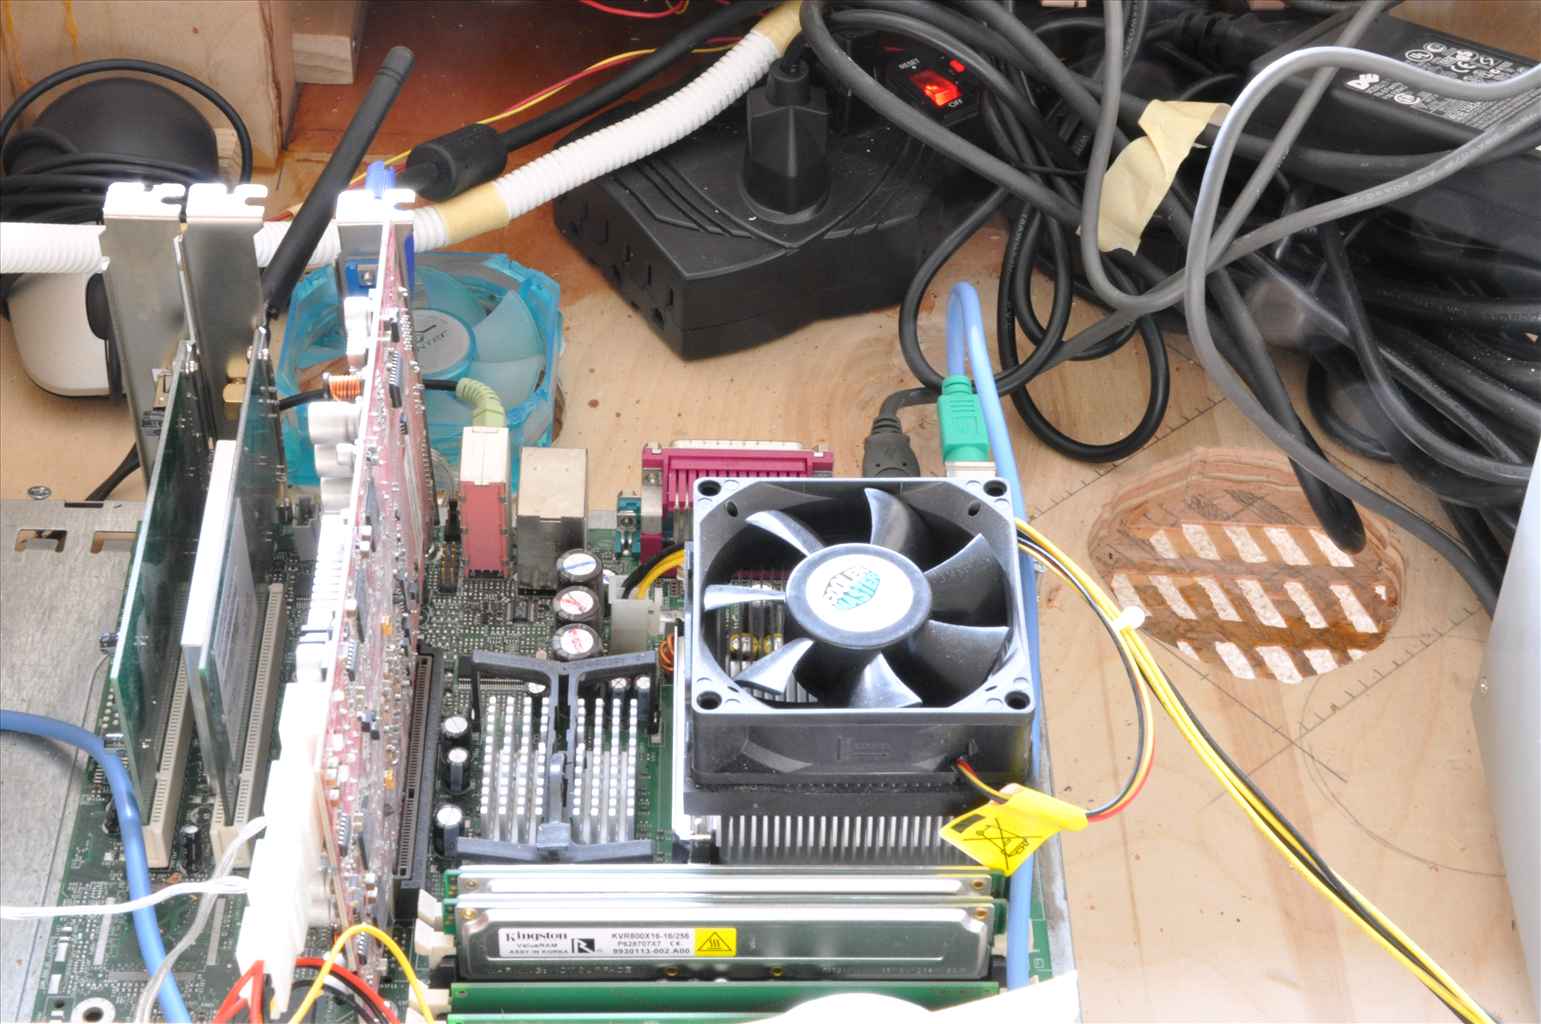
I had a 2.5″ drive handy, so I usedthat, and screwed it into the side of the box. I also handcut some fan vents, one for in, one for out. I routed theplywood out so I had the wood was thin and used an X-Acto knife anda hammer to cut out a nice pattern.
I had planned on doing this for thespeaker holes as well, but plywood of this quality can only take somuch hammering before it just shatters. The fan holes looklike this from the inside:
The final piece was the controlpanels. This is a lot simpler that one might expect. Ibought a KeyWiz40-STfrom GrooveGameGear to make it easy on myself. Ground connections are daisy chained each button only has onewire going to the KeyWiz. What I ended up with was a bundleof wires coming out of each control panel and going to the centerof the box where they are all connected to the KeyWiz.
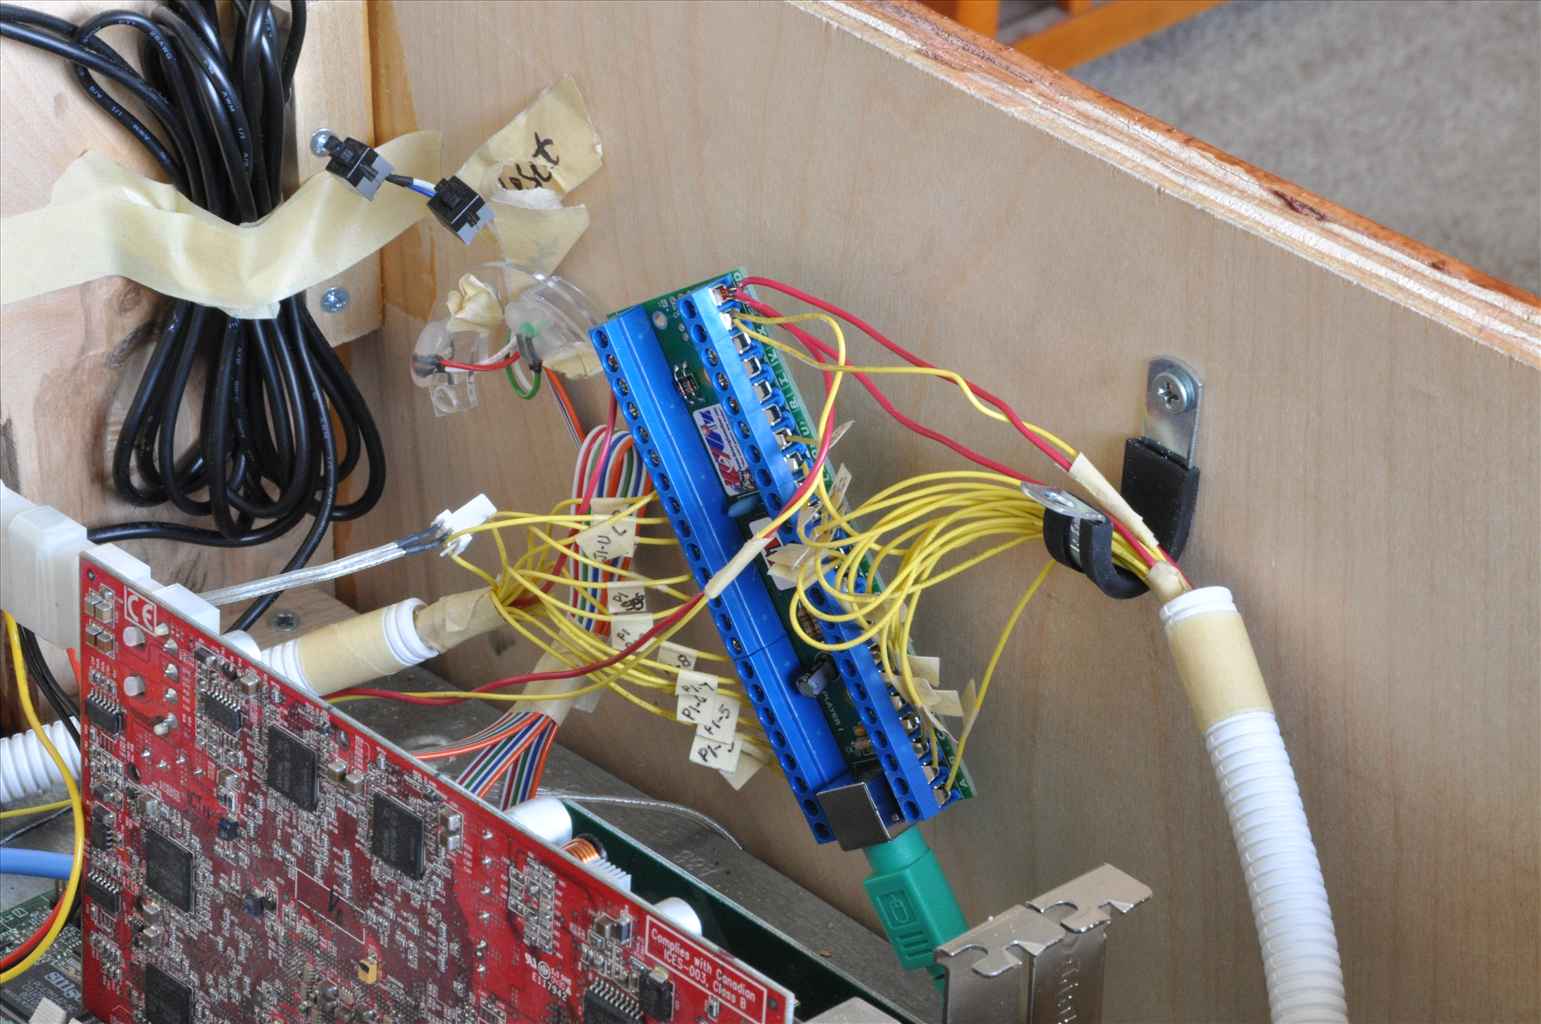
After I had done that, I realizedthe need to make use of the Shazam! button (essentially a shiftbutton) on the KeyWiz for system functionality. So I drilleda hold in the side of each control panel for a shift button, andran a standalone pair of wire from each of those.
I use this button extensively on thesoftware side of things.
After that I ran some power (which could be sorted out a bit better on the inside of the box) and I was done building! I could probably sort out the power button for the computer in a better way, but my software solution circumvents it using system standby. Plenty more photos of the whole process are available here. I also took some photos of a Revenge of Doh cabinet for research purposes, and those are available here.
A write up on my software is comingsoon.
Very awesome cocktail table. i have bookmarked this for future reference when I build my own. How much did you end up spending to build it? Thanks, Steve.
@Steve:
Thanks for the compliment :). Materials for the box itself cost me just under $300. That doesn't include the computer or monitor, though. I just used an old computer I had in storage. It's a 2Ghz single-core with 512MB RAM, but it runs most of the MAME games fine. I can tell it's just barely enough though since it hiccups a bit when it's doing any sort of background processing (windows update, Dropbox, etc).
Thanks for all the details. I’d like to undertake my own cocktail cabinet but without it becoming a full-time hobby doing research on every little detail, so this write-up is immensely helpful. Nice work. Matth
Thanks for the documenting the process you went through to get your cabinet done. Looks very good!